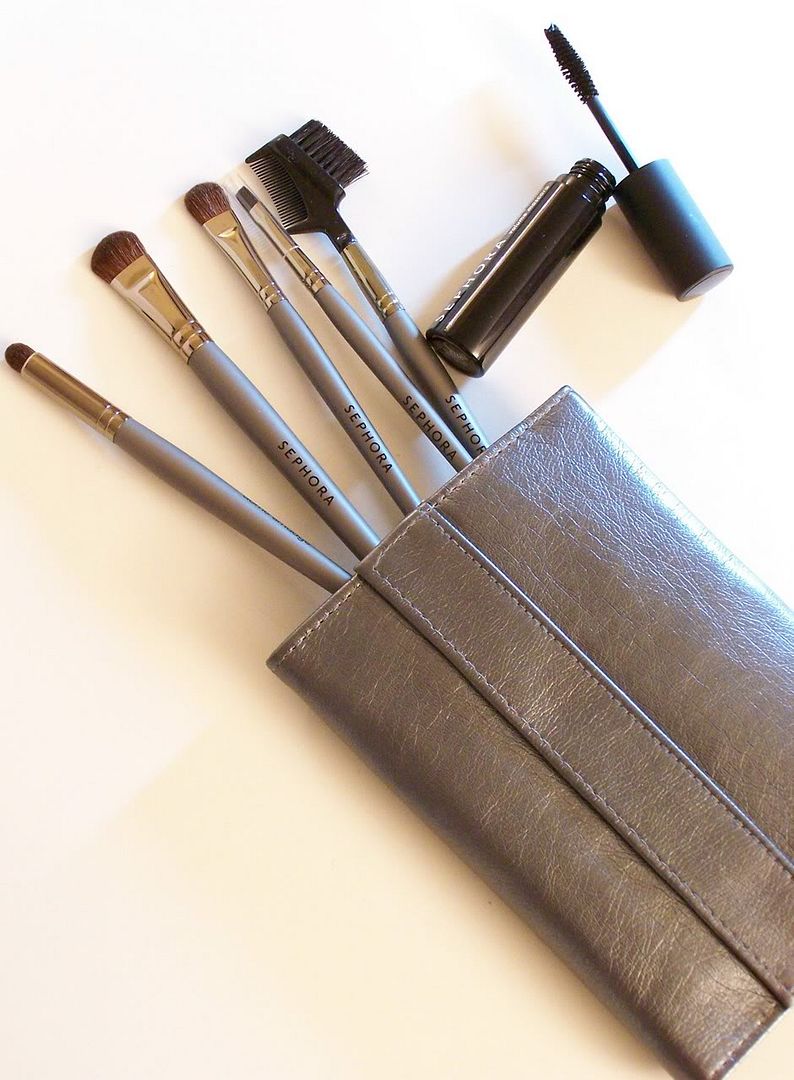
 This is a great gift I received from Sugar, Inc./Coutorture in the mail. It's a fantastic 6 piece set of tools to create this season's hottest makeup trend -- The Smokey Eye. The set includs 5 Sephora Professionelle brushes (wide smudge, all over shadow, small domed smudge, detail, and dual-sided brow brush and come), Volume Mascara in black and the how-to instructions for applying the look, in a very chick gunmetal faux leather case.
Thanks a lot!
 Project Details
 Pattern: Huckleberry Ascot
Designer: Kat Coyle
Yarn: RY Classic - Cashcotton (DK 607)
Needles: Size 6 (4 mm): 24" circular
This was such a quick and easy project, how could I not make this? I haven't completed a knitting project in such a long time, this was just what I needed... baby steps! Since I had no clue whether this would be another abandon UFO, I decided to work with what I had in my stash which was brand new balls of Rowan Cashcotton (it is so soft)! This project was simple garter stitch worked sideways, with short-row shaping to create a wide bell shape at each end. On each end, stitches were picked up (I remembered I'm not real fond of this part) to add bobbles. Even with the short-row shaping, this is an excellent project for a beginner (no purling).
This was an excellent distraction from the burn out and sore finger tips from all of the hand sewing on the jacket. Now, back to sewing...
S3529
S3530
S3538
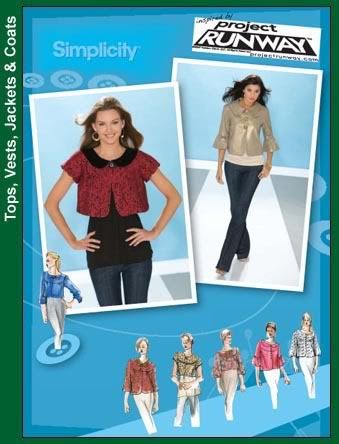
S3535
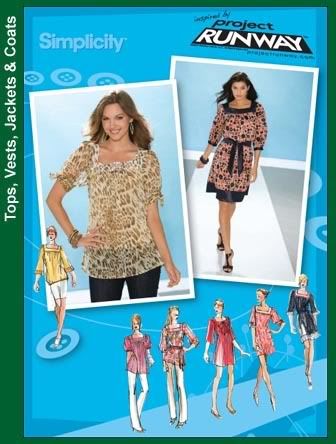
S3541
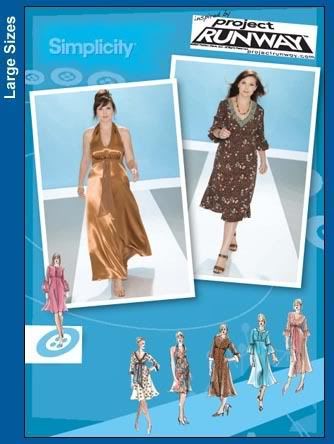
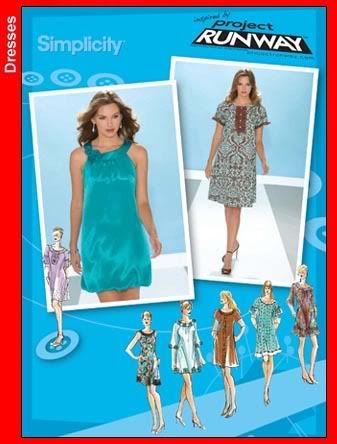
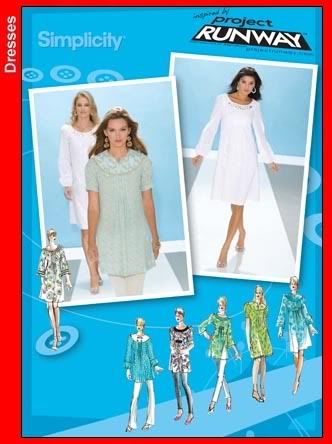
*SIGH* What Project Runway episode inspired this?? They give a whole new meaning to "Make it work." I'm not totally trashing them... they look "OKAY"... but, THIS is not what I expected. I thought they would be waaaaaaaaay more fashion forward. These just look like plain ole Simplicity Patterns... nothing special here. I was expecting something along the lines of a gorgeous Laura Bennett dress... something creative from Santino Rice... something jazzy from Michael Knight... one of those colorful maxi dresses from Uli... something sleek from Kara Saun... not even a wrapdress from Kara Janx??
Just because you can whore out your brand, doesn't mean you should!
I'm so disappointed... y'all feel free to discuss this amongst yourselves.
Just because you can whore out your brand, doesn't mean you should!
I'm so disappointed... y'all feel free to discuss this amongst yourselves.
More adventures in dilettante couture!
 None of the resources I previously listed gave any instructions for the pockets, so I used common-sense and winged it. I knew that the top of the pocket was to be folded under, creating a facing and I also had to fold all of the seam allowances under. I quilted the lining to the pockets and trimmed it down to reduce the bulk. I handstitched the trim and fell stitched the pockets to the jacket.
 As you see here, I used my walking foot and quilted down the white lines in the fabric because the lining fabric was white and I wanted to make sure that the thread blended into the boucle.
 Here are the 3 piece sleeves waiting to be sewn together .
Once upon a time, I use to say that I hated handsewing with a passion. This project has really challenged my handsewing skills. I've always been impressed by the details of hand-workmanship and always felt that I didn't have the patience for it. I am so proud of myself. Who would have thought I would be able to make perfectly, invisible catchstitches! The next time you flip through Vogue magazine and see a couture garment priced upwards to 5 figures... trust me, it's priced correctly! You never have an appreciation for things like that until you sit down to do it yourself.

Okay... this is where I so far. I've done everything except sewn on the sleeves, the trim and the chain at the hemline. It was an adventure getting the plaid to match in the curves of the princess seam.
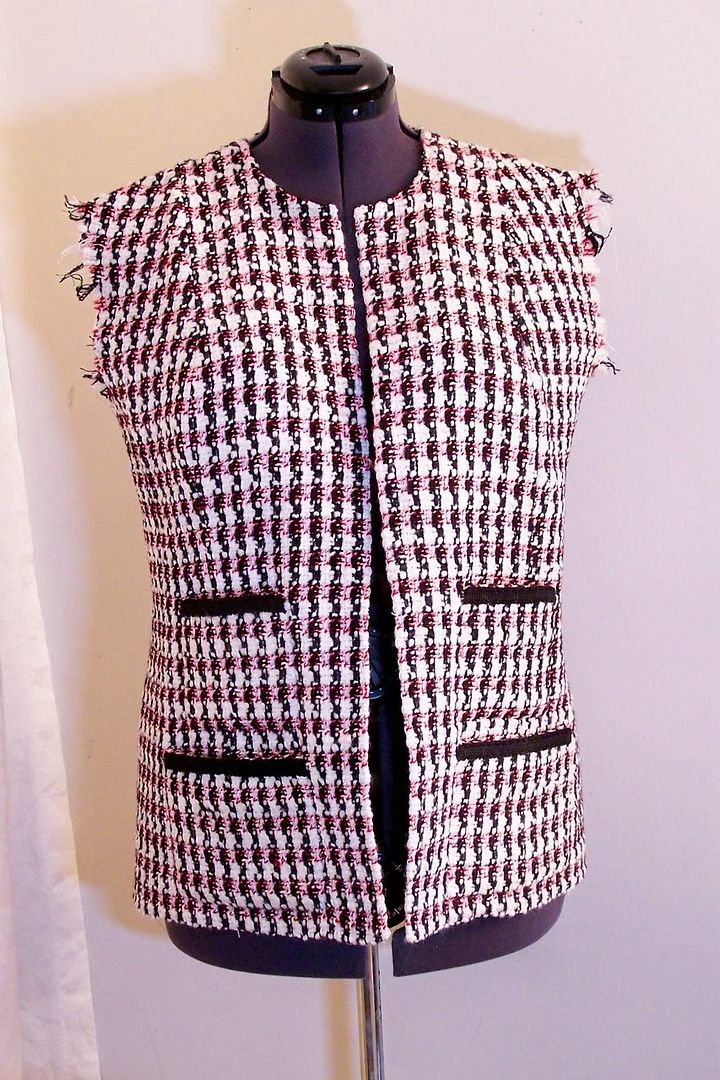
Okay... this is where I so far. I've done everything except sewn on the sleeves, the trim and the chain at the hemline. It was an adventure getting the plaid to match in the curves of the princess seam.
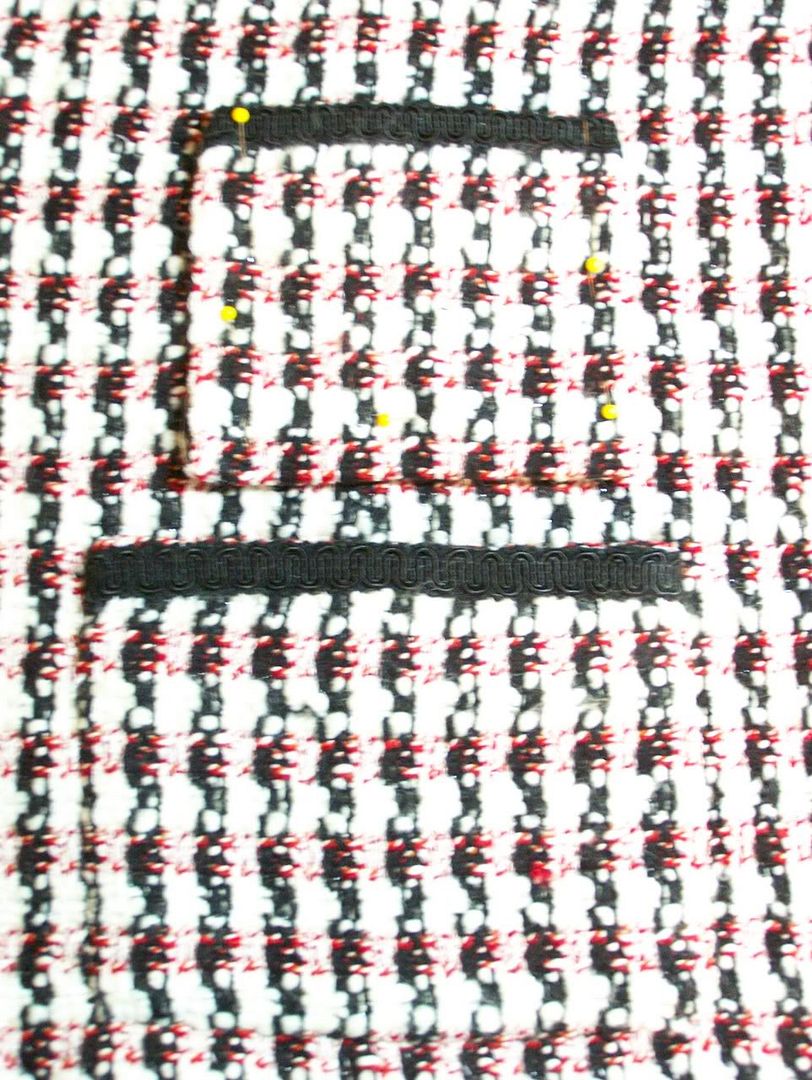 None of the resources I previously listed gave any instructions for the pockets, so I used common-sense and winged it. I knew that the top of the pocket was to be folded under, creating a facing and I also had to fold all of the seam allowances under. I quilted the lining to the pockets and trimmed it down to reduce the bulk. I handstitched the trim and fell stitched the pockets to the jacket.
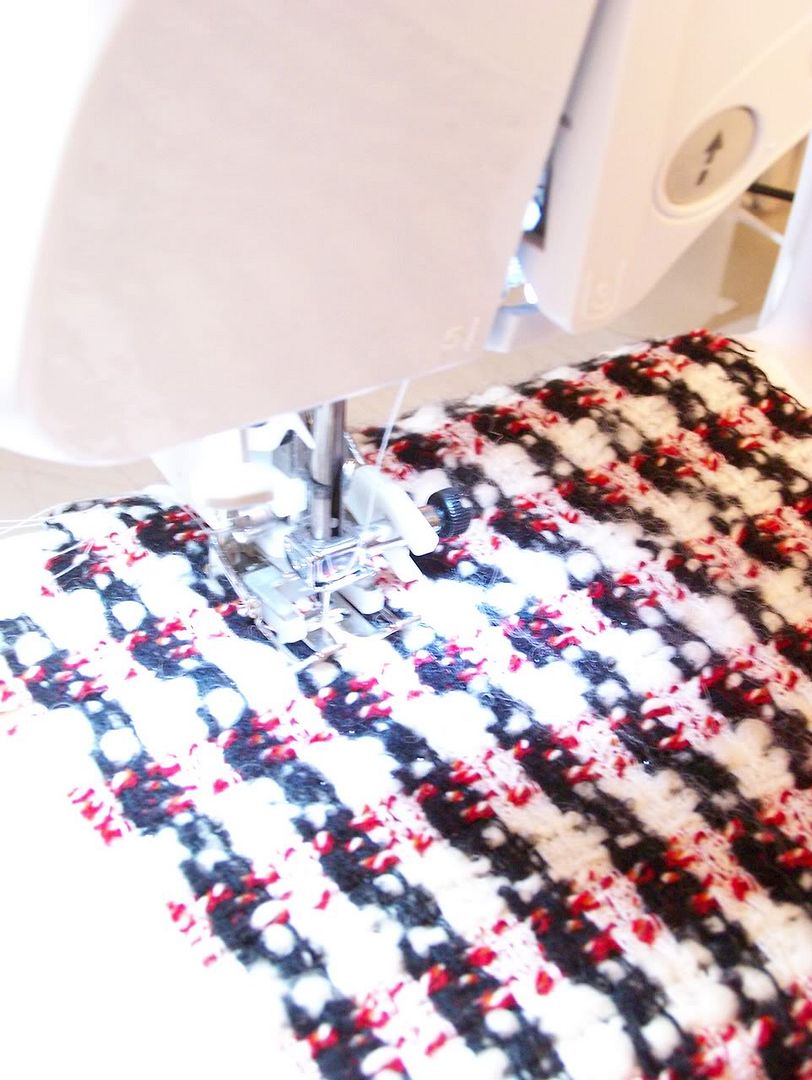 As you see here, I used my walking foot and quilted down the white lines in the fabric because the lining fabric was white and I wanted to make sure that the thread blended into the boucle.
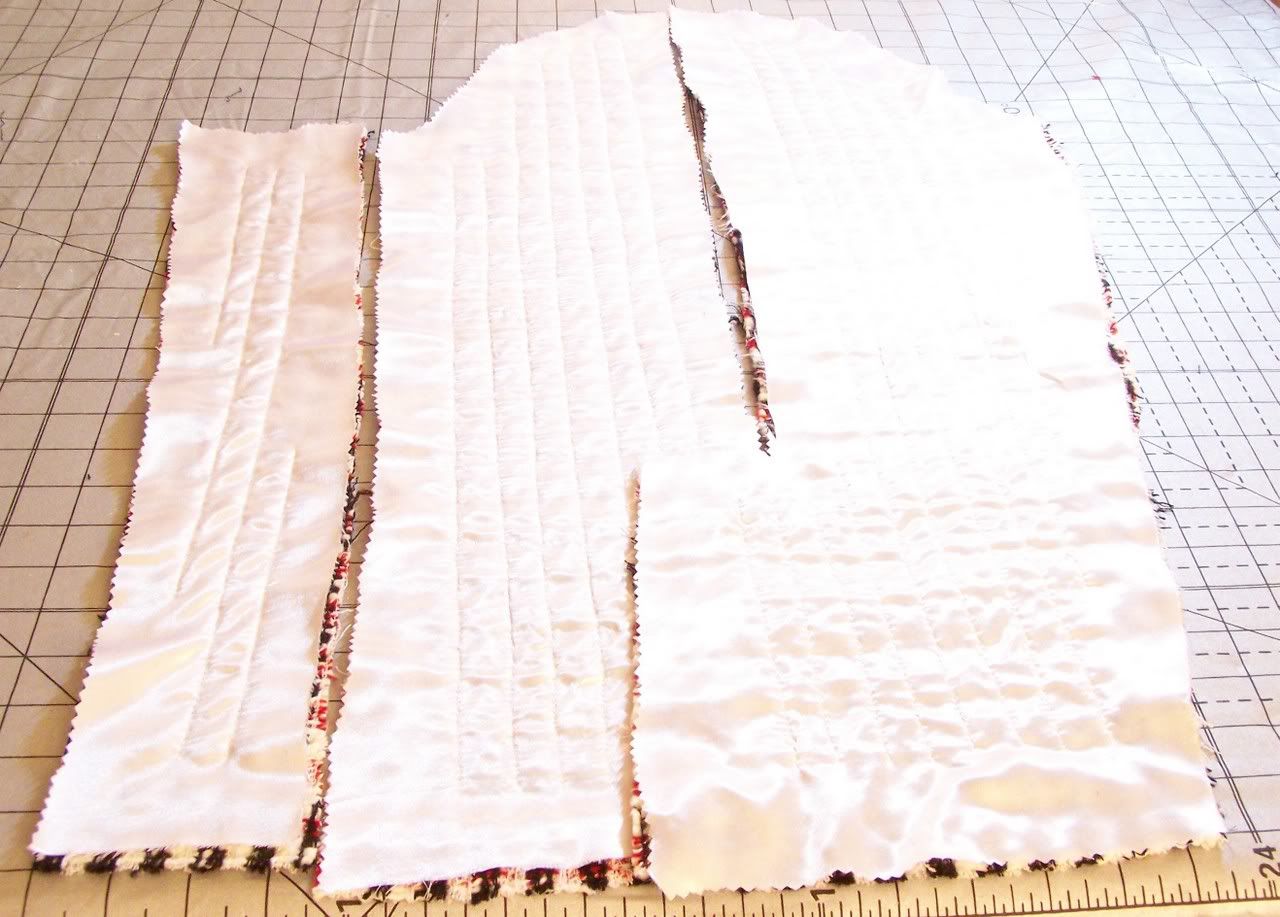 Here are the 3 piece sleeves waiting to be sewn together .
This one is a dedication... get well soon!
Note: I am much further along than this, but I thought I should break the posts up
 When I tissue fitted the pattern on my dressform (which is padded to my exact measurements), the pattern's center front did not meet the center front of the dressform.
 I unpinned the seamline in the bust area and pulled it over to line it up correctly. I determined that I would need to add 2" to the width.
 I unpinned the pieces and pressed it flat.
 In order to move the seam over to the correct position, I cut pattern from the bottom up, 1 1/2" from the left edge, stopping 5/8" from the top at the shoulder seam. This creates a hinge.
 Half-way between the bust notches, cut horizontally up to, but not through the vertical cut edge. This spread will be minor. I then spread the pattern pieces 2"** and filled in with tracing paper.
**Cup size is determined by the difference between the high bust and the full bust:
1" = A
2" = B
3" = C
4" = D
5" = DD
The band size is your chest measurement below the bust.
I adjust for a FBA 1/2" per cup size.
FBA on shoulder princess seams
I decided to post how I did this because most of the online tutorials focus on armhole princess seams.
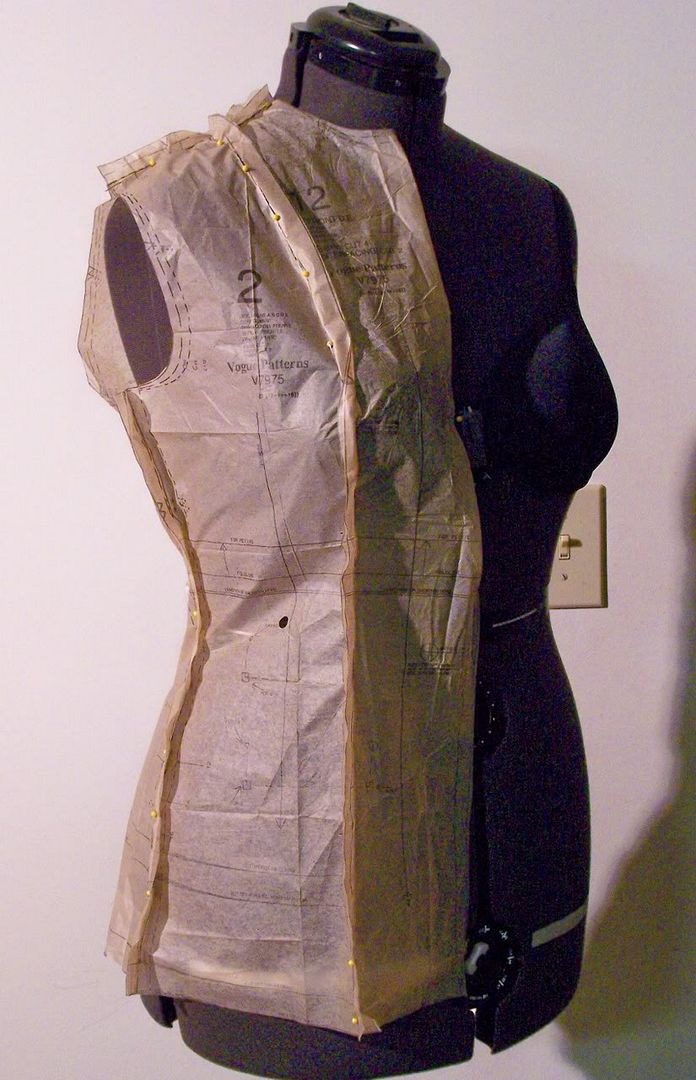 When I tissue fitted the pattern on my dressform (which is padded to my exact measurements), the pattern's center front did not meet the center front of the dressform.
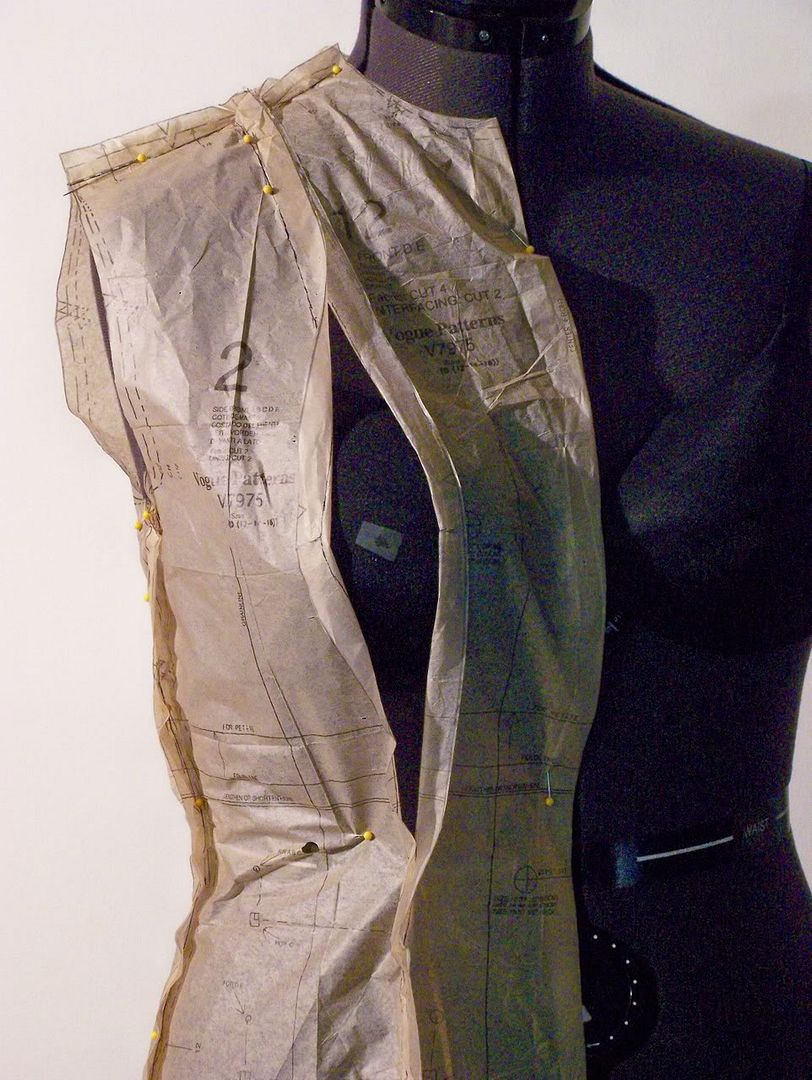 I unpinned the seamline in the bust area and pulled it over to line it up correctly. I determined that I would need to add 2" to the width.
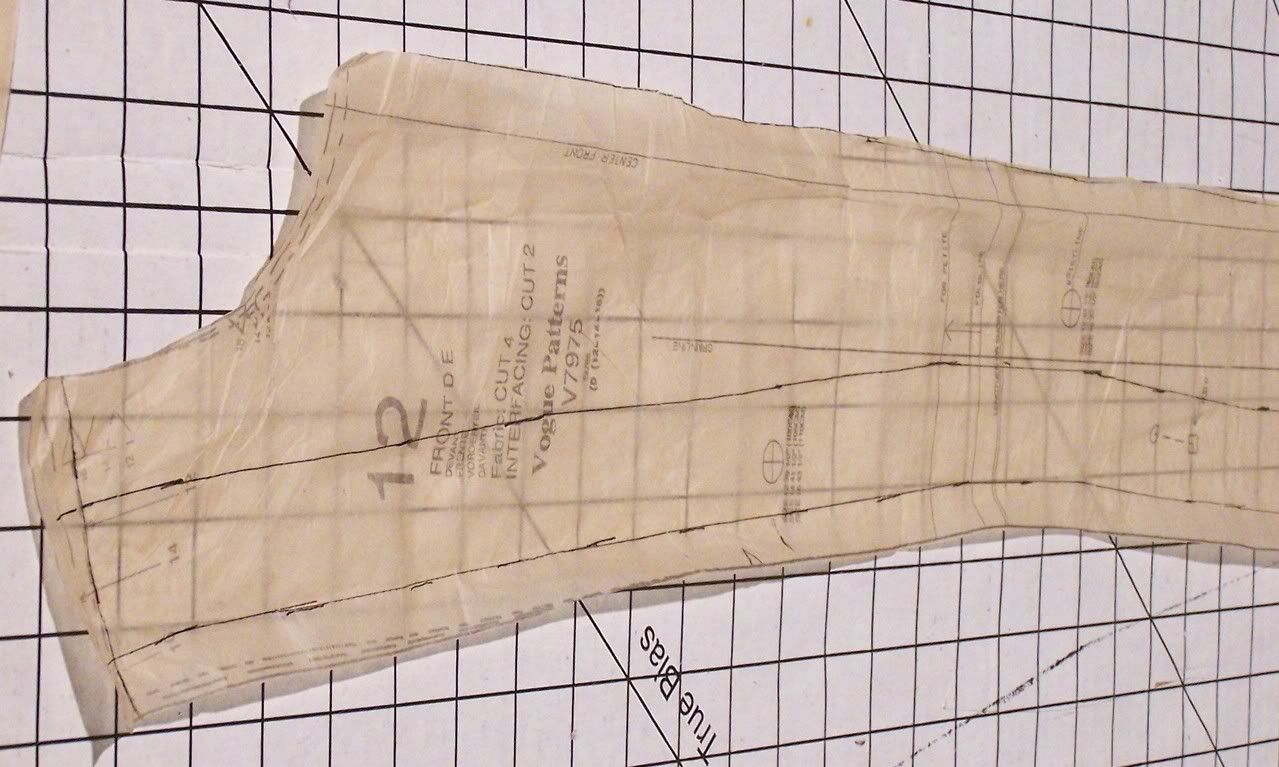 I unpinned the pieces and pressed it flat.
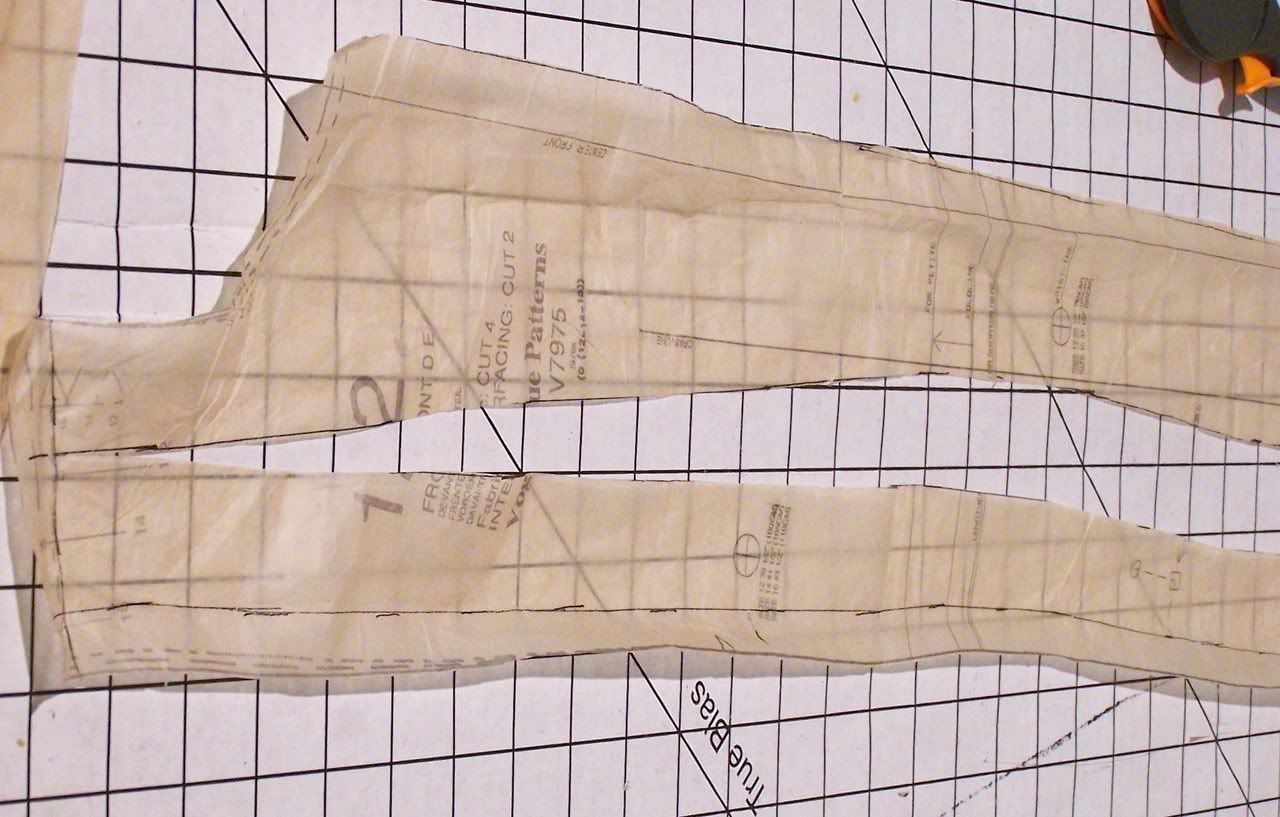 In order to move the seam over to the correct position, I cut pattern from the bottom up, 1 1/2" from the left edge, stopping 5/8" from the top at the shoulder seam. This creates a hinge.
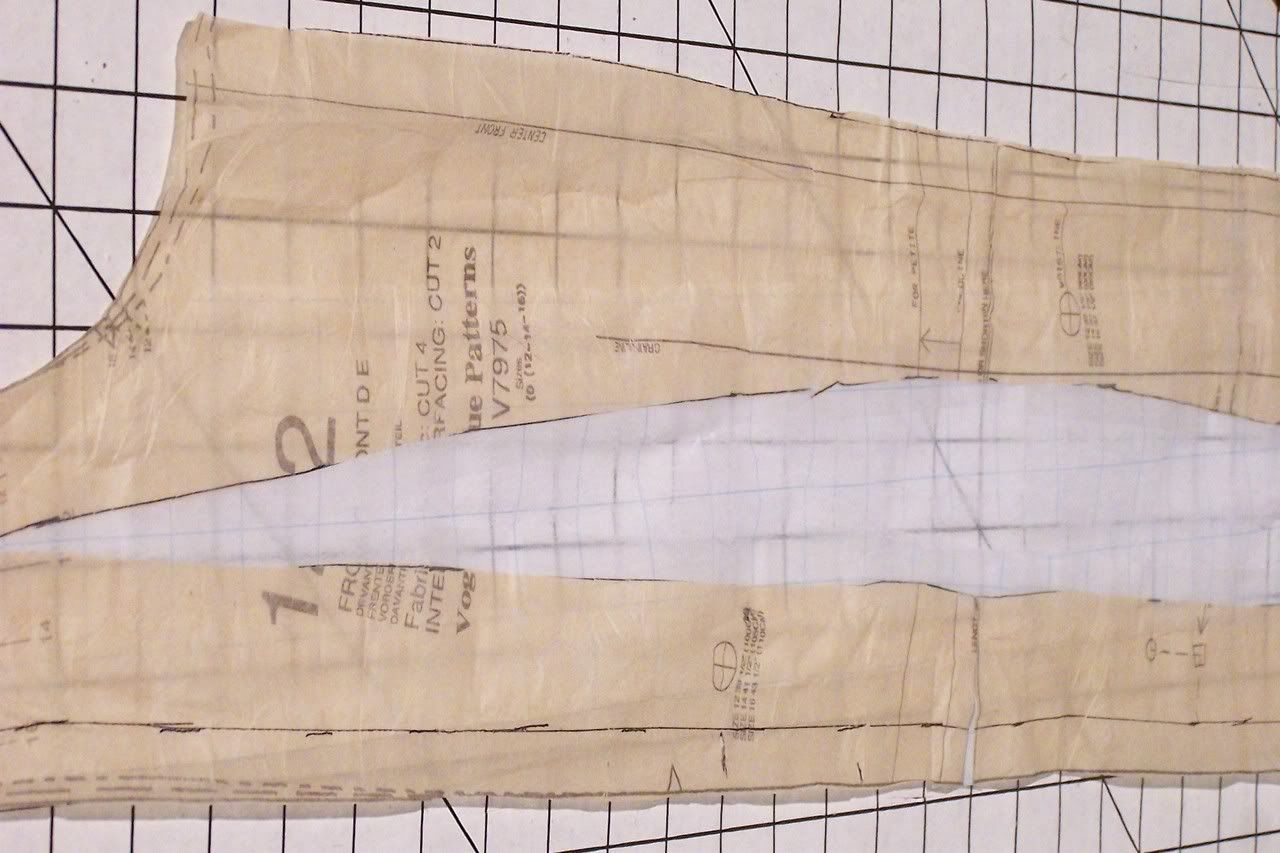 Half-way between the bust notches, cut horizontally up to, but not through the vertical cut edge. This spread will be minor. I then spread the pattern pieces 2"** and filled in with tracing paper.
**Cup size is determined by the difference between the high bust and the full bust:
1" = A
2" = B
3" = C
4" = D
5" = DD
The band size is your chest measurement below the bust.
I adjust for a FBA 1/2" per cup size.


I bought a cutting table and I love it already! I was in Hancocks doing my usual browsing and saw this. I had to make a quick call to Michael to come and pick it up for me... it weighs 62lbs and was a little too big to fit in my trunk. My son put it together for me... this is one of the benefits of having a man child. Michael looked at the box and questioned the table cover. He figured if I had the table, might as well have the silicone heat-resistant ironing cover, so he went back and bought that too.
I can now give my dining room table a rest! So, for those of you that don't have one of those big beautiful sewing rooms, where do you cut?
Forget the small talk, here are the ones I like:
 I love this coat! I'll be making this as soon as possible! I like view B, which is a perfect car coat length, but I prefer the in seam pockets and the high collar.
 Black & Ivory Houndstooth - 70% wool/30% polyester

 I really like these two dresses... not sure if I'll make them or even buy the patterns , but I like them. I may feel more inspired if an occasion arises or when the weather warms up.
 I really like this robe. Not the illustration, but the technical drawing. I envision this in a deep purple or rich merlot velvet. It screams Christmas morning!
 I'm totally hooked on knits. This season is all about comfort for me. I don't plan to turn on the iron unless I'm sewing. I'll be making the tunic, tank and pants.
 These little pajamas are perfect for Mikaela. I'm going to pick up this pattern and save it for Christmas break so she and I can work on it together.
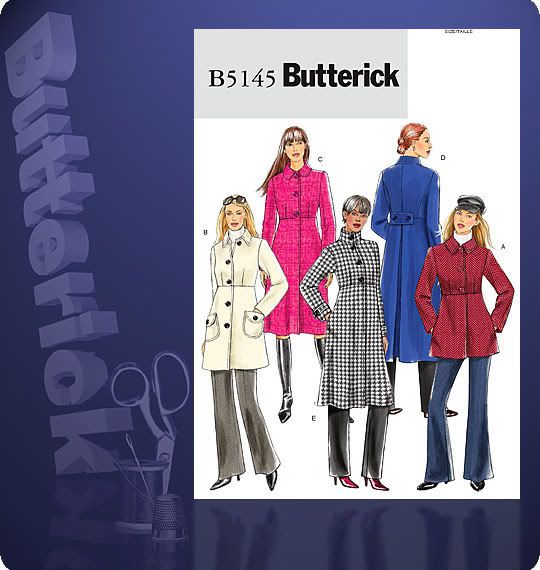 I love this coat! I'll be making this as soon as possible! I like view B, which is a perfect car coat length, but I prefer the in seam pockets and the high collar.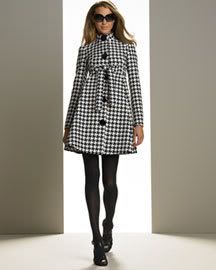
I've been stalking this coat for a couple of months now (the pic resides on my inspiration board).
 Black & Ivory Houndstooth - 70% wool/30% polyester
I had already placed an order for 3 yds of this fabric with a coat in mind.
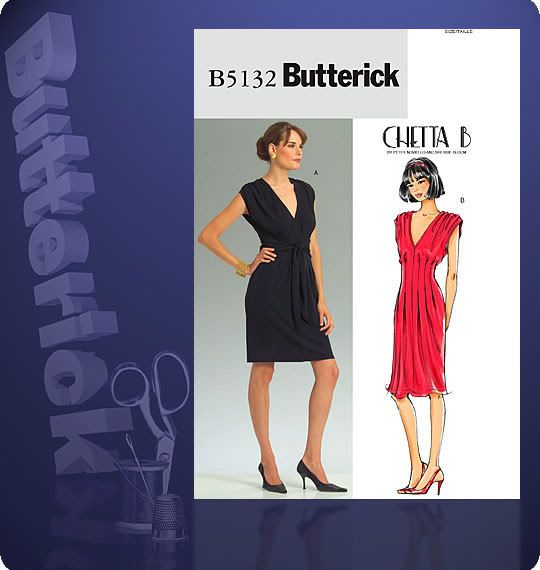
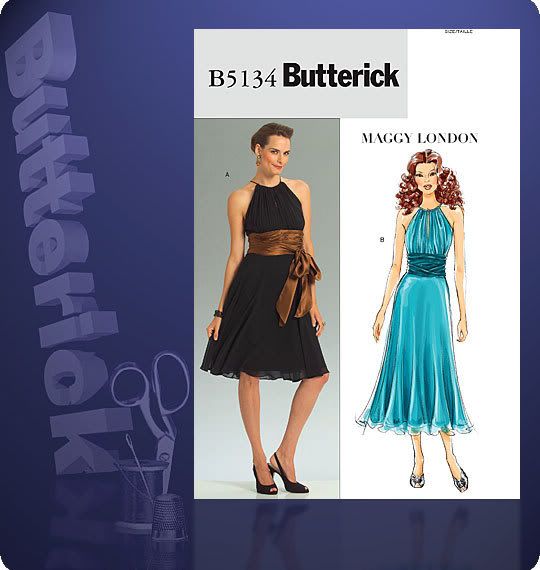 I really like these two dresses... not sure if I'll make them or even buy the patterns , but I like them. I may feel more inspired if an occasion arises or when the weather warms up.
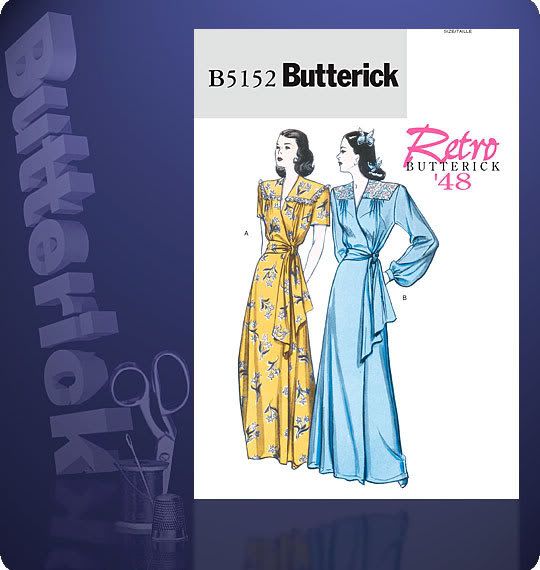 I really like this robe. Not the illustration, but the technical drawing. I envision this in a deep purple or rich merlot velvet. It screams Christmas morning!
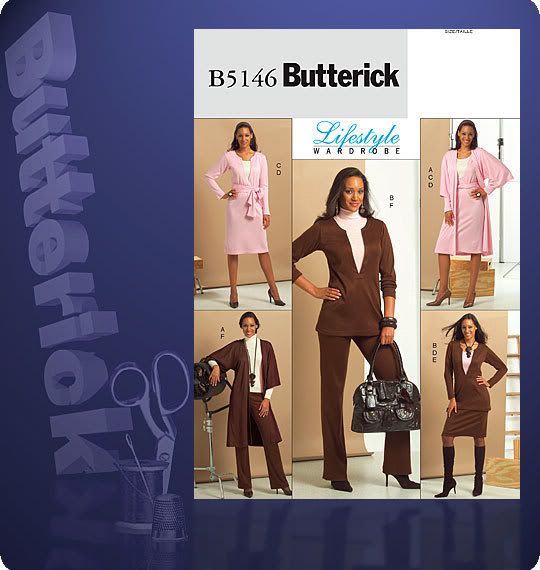 I'm totally hooked on knits. This season is all about comfort for me. I don't plan to turn on the iron unless I'm sewing. I'll be making the tunic, tank and pants.
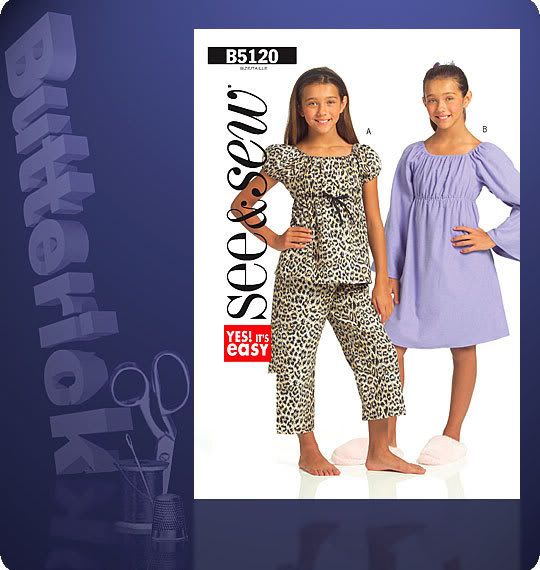 These little pajamas are perfect for Mikaela. I'm going to pick up this pattern and save it for Christmas break so she and I can work on it together.

Let me start off saying that I am the biggest Denzel fan... since he was Dr. Phillip Chandler on St. Elsewhere! I will see ANY movie he's in so this one was no exception.
Denzel portrays Frank Lucas, a North Carolina born heroin kingpin from Manhattan in 1970s America, who is smuggling the drug into the country in the coffins of soldiers returning from the Vietnam War. Denzel (IMO) delivers an Oscar-worthy performance in this role. Even when their is no dialogue, it's written all over face. As equally fantastic is Russell Crowe (Gladiator is still my favorite Russell movie), who plays Richie Roberts, the cop out to get him.
The all-star supporting cast was superb! Josh Brolin portrays a menacing, money-grubbing, slimy, dirty cop. Chiwetal Ejifor (I love his ability to drop the English accent), plays Frank's brother Huey... he's an awesome sidekick. Ruby Dee is Mama Lucas... this lady still has it! I wouldn't be surprised if there is a Best Support-Actress nomination looming in the future. Other co-stars are Cuba Gooding, Jr., Idris Elba, rappers Common, T.I. and RZA.
Ridley Scott has brilliantly directed one of, if not, the best movie of the year. If you are looking for a shoot 'em up, bang bang mob movie (i.e. Scarface) this isn't it. This movie may not have a lot of hardcore action, but it has a very compelling storyline of the rise and fall of a drug lord and absolutely captures your attention.
Go see it!