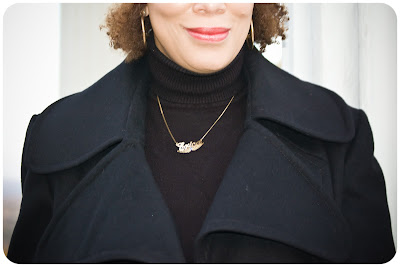
I love coatmaking! I love the art of tailoring a coat. I've learned that so many people are intimidated at the thought of sewing a coat. I'm a dive into the deep end, head first kinda sewing gal. So when it comes to tackling a sewing project? I ain't never scared! (A double negative was needed to convey that feeling!) But I do understand how overwhelming some can feel when it comes to fully tailoring a coat. It's a lot of steps and the best skill you can possess? Patience.
The reason why I've fallen in love with vintage coat patterns are the drafting, the pattern pieces and the instructions. In the past, I would have had to draft interfacing pattern pieces and sew with a stack of reference books. And based on all of the things I've learned from multiple tailoring resources over the years, these instructions are comprehensive and everything I needed to make this coat.
Vintage patterns come in single pattern sizes. I used the size 14. The sizing and ease is generous. I can wear a blazer underneath this coat with comfort. I added 3.25" to the length. That was the only fit alteration I needed. My fabric is a pretty basic Black Solid 100% Wool Coating from Mood Fabrics.com.
The fronts of the coat are interfaced with hair canvas. (If you need to buy some, be sure to use my coupon code in the sidebar.) In order to stay the roll line of the lapels, I used 1/4" black twill tape. Here is a previous post discussing the hair canvas interfacing and my machine padstitching. The collar is interfaced exactly like the lapels.
The backstay is also cut from the hair canvas. I normally use plan muslin fabric. But the pattern suggested the interfacing. I was concerned that the hair canvas would be prickly with only the barrier of the lining fabric. From wearing it briefly for the photos, I didn't feel anything. Here's hoping it stays that way.
The pattern did not suggest this, but this is where I do my own thing. I know how I like to set sleeves in jackets and coats. I ease the sleeve cap with bias strips of hair canvas. See the details here on Tailoring a Coat Sleeve.
If a pattern suggest shoulder pads, use them! If you're making a coat and it doesn't suggest shoulder pads, use them anyway! Even a thin set, about 1/4" thick can make a difference. I make my own. I've talked about that here and here. In my sewing group, The Amazing Sew-Alongs, we discussed using fleece shoulder heads.
Since I set my sleeves with the bias cut hair canvas strips, the sometimes act as shoulder heads. I make a judgement call on how the sleeve is hanging regarding whether or not I need to add an additional sleeve head. For this coat, I didn't.
Before I added my lining and I was trying on the coat, there was a glaring detail missing: pockets!
I don't remember which one I used, but I grabbed a patch pocket and flap from another coat pattern, measured down from the shoulder and placed. I topstitched it in the same manner as the other topstitching.
This Michael Kors coat was my inspiration.
Here is the inside! Y'all know I love beautiful insides. I'm never ashamed to allow someone to examine my garments inside and out.
The lining is completely handsewn instead of being bagged. Instead of doing a basic cross stitch to secure the back lining pleat, I just use a cute embroidery stitch. And I added a hang chain that I also bought at Jo-Anns. I added a contrasting color piping between my lining and facings. The hem of the coat is interfaced -- of course. A "Jump Hem", which is a pleat formed at the lower edge for wearing ease is created. Also created at the sleeve hem as well.
The coat was sewn with Schmetz needles in Universal size 80/12, 100/16 with Gutermann Mara 100 in black. And topstitched with Schmetz 100/16 topstitch needles, using Coats & Clark Button Craft Thread c/o Coats & Clark.
And love that when I take this coat off in public and turn it inside out and toss it over a chair, the inside is just as beautiful! My lining fabric is Black Flannel Back Satin from Jo-Anns.
And it also looks and hangs beautifully when undone.


