Note: I am much further along than this, but I thought I should break the posts up
 When I tissue fitted the pattern on my dressform (which is padded to my exact measurements), the pattern's center front did not meet the center front of the dressform.
 I unpinned the seamline in the bust area and pulled it over to line it up correctly. I determined that I would need to add 2" to the width.
 I unpinned the pieces and pressed it flat.
 In order to move the seam over to the correct position, I cut pattern from the bottom up, 1 1/2" from the left edge, stopping 5/8" from the top at the shoulder seam. This creates a hinge.
 Half-way between the bust notches, cut horizontally up to, but not through the vertical cut edge. This spread will be minor. I then spread the pattern pieces 2"** and filled in with tracing paper.
**Cup size is determined by the difference between the high bust and the full bust:
1" = A
2" = B
3" = C
4" = D
5" = DD
The band size is your chest measurement below the bust.
I adjust for a FBA 1/2" per cup size.
FBA on shoulder princess seams
I decided to post how I did this because most of the online tutorials focus on armhole princess seams.
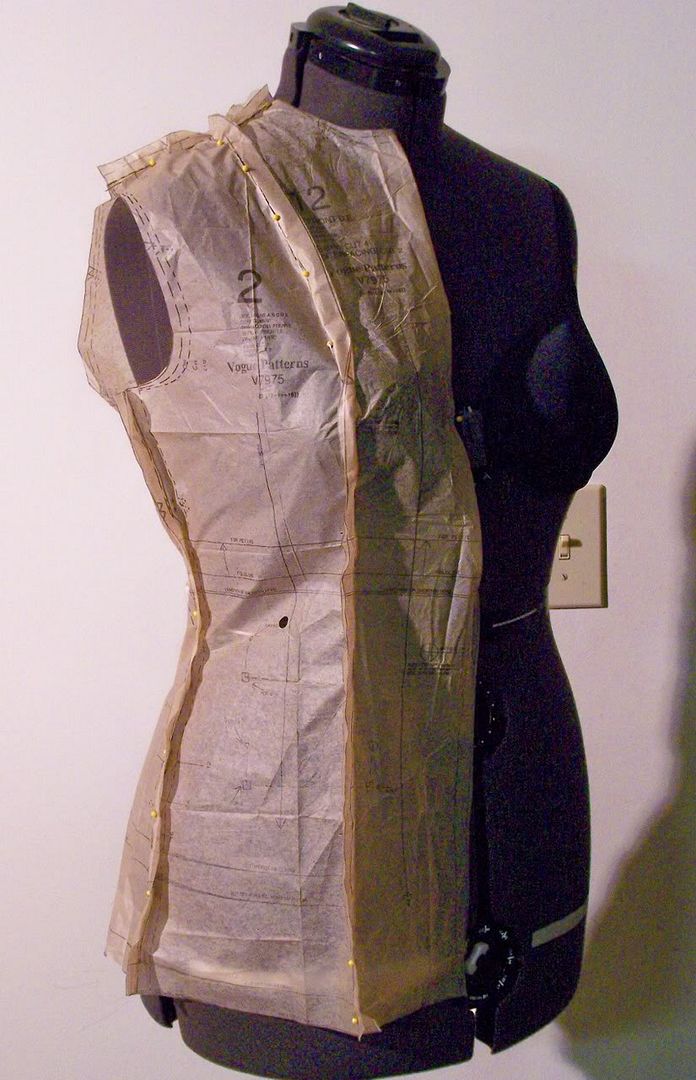 When I tissue fitted the pattern on my dressform (which is padded to my exact measurements), the pattern's center front did not meet the center front of the dressform.
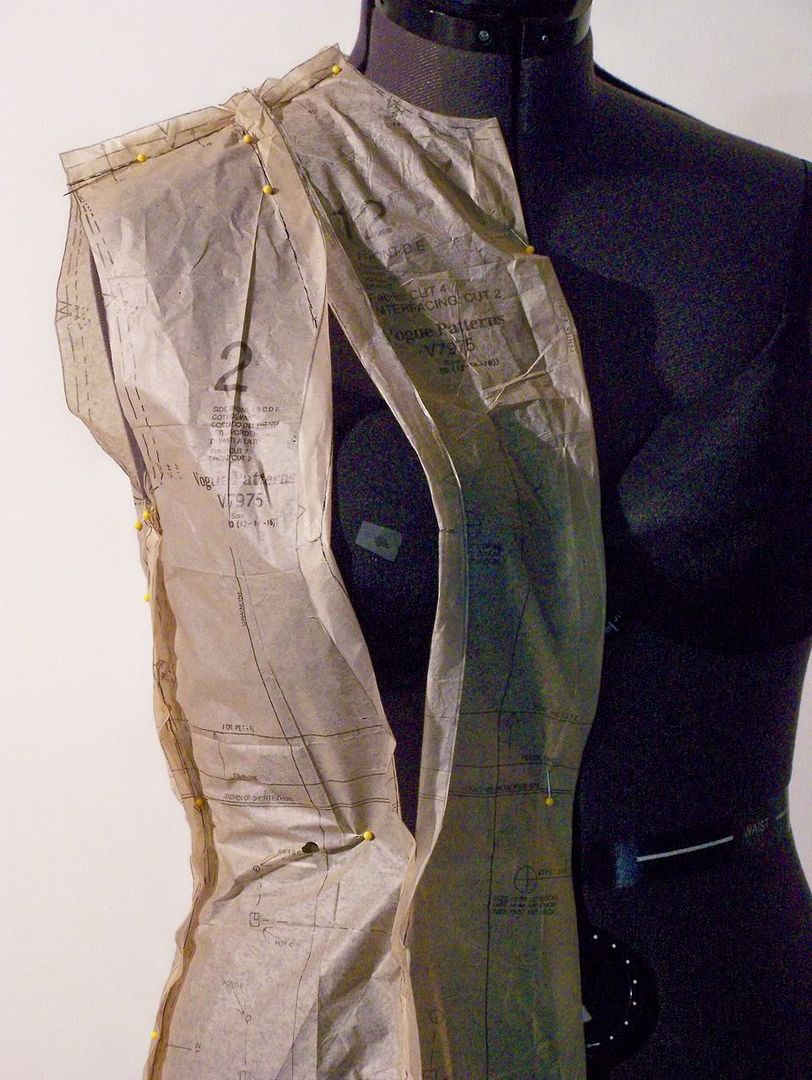 I unpinned the seamline in the bust area and pulled it over to line it up correctly. I determined that I would need to add 2" to the width.
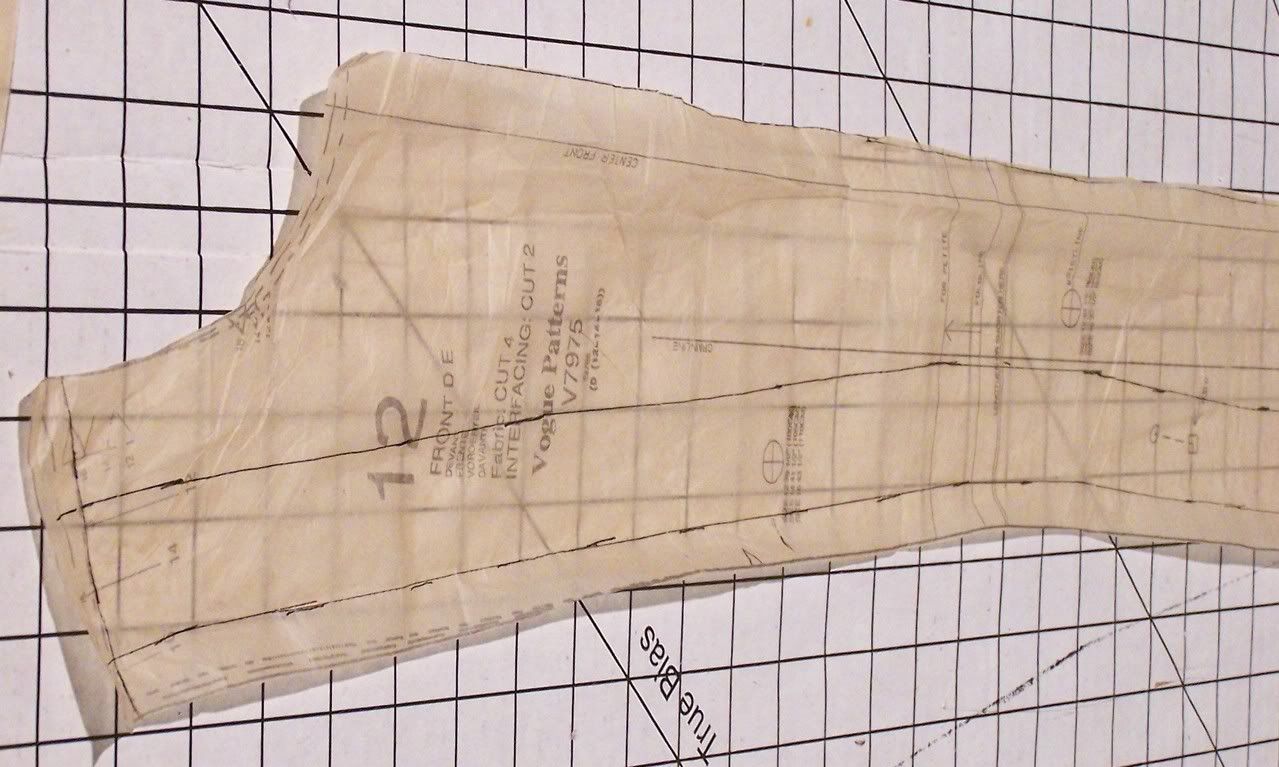 I unpinned the pieces and pressed it flat.
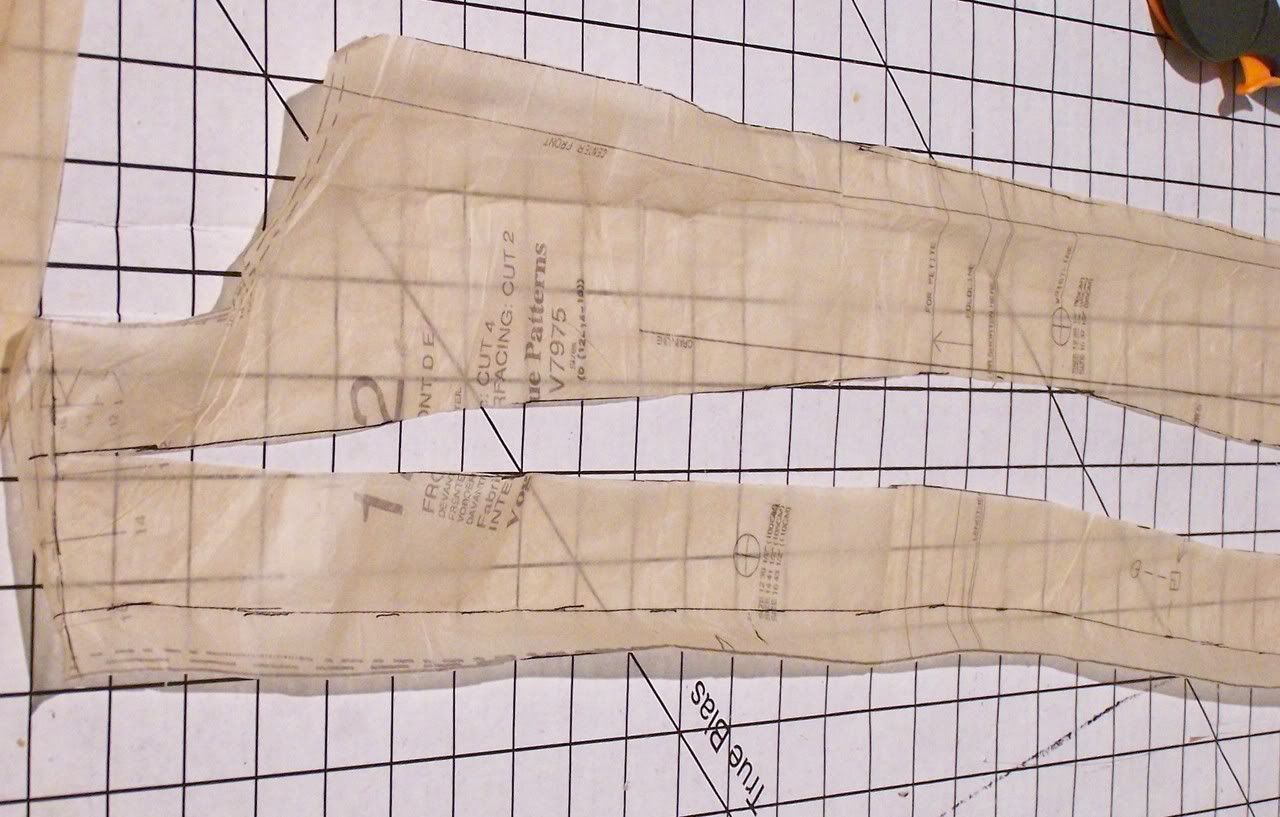 In order to move the seam over to the correct position, I cut pattern from the bottom up, 1 1/2" from the left edge, stopping 5/8" from the top at the shoulder seam. This creates a hinge.
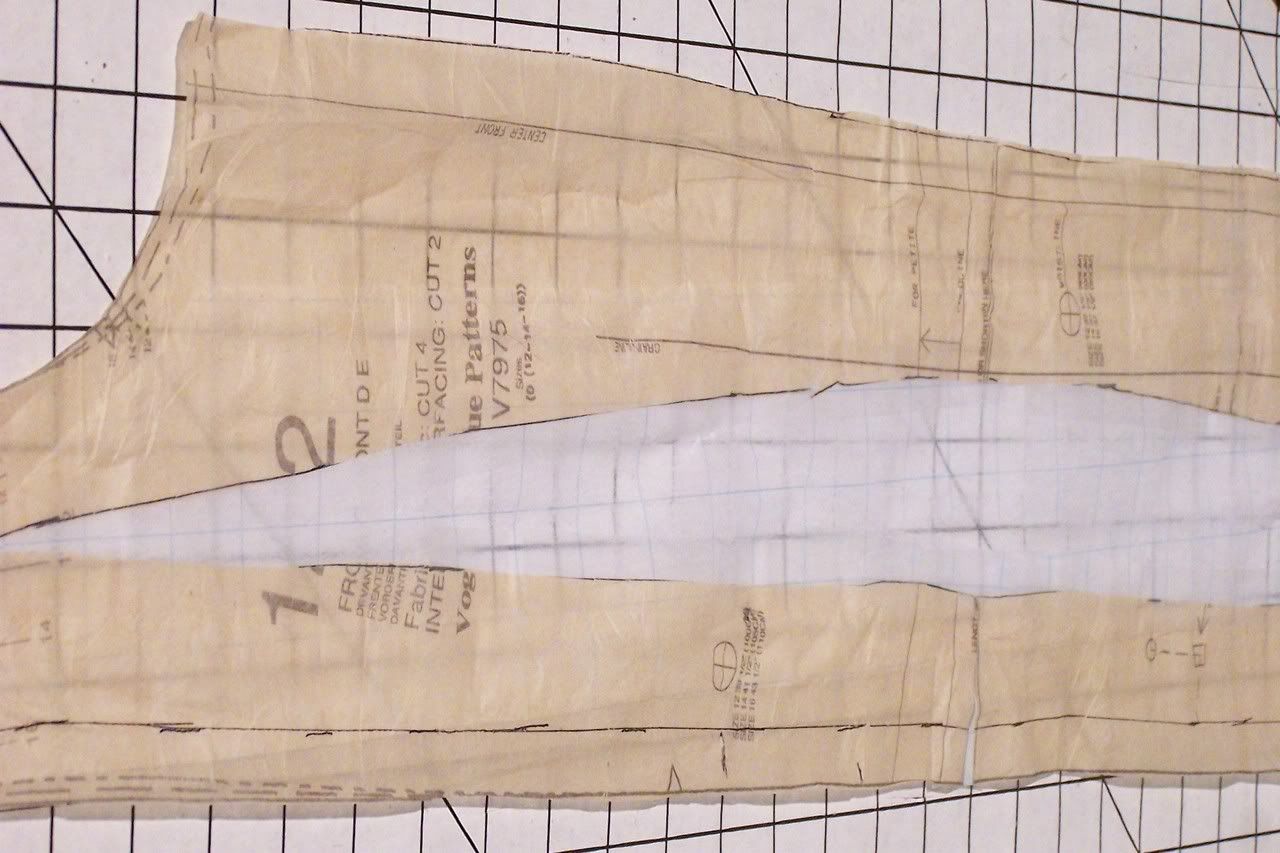 Half-way between the bust notches, cut horizontally up to, but not through the vertical cut edge. This spread will be minor. I then spread the pattern pieces 2"** and filled in with tracing paper.
**Cup size is determined by the difference between the high bust and the full bust:
1" = A
2" = B
3" = C
4" = D
5" = DD
The band size is your chest measurement below the bust.
I adjust for a FBA 1/2" per cup size.


I bought a cutting table and I love it already! I was in Hancocks doing my usual browsing and saw this. I had to make a quick call to Michael to come and pick it up for me... it weighs 62lbs and was a little too big to fit in my trunk. My son put it together for me... this is one of the benefits of having a man child. Michael looked at the box and questioned the table cover. He figured if I had the table, might as well have the silicone heat-resistant ironing cover, so he went back and bought that too.
I can now give my dining room table a rest! So, for those of you that don't have one of those big beautiful sewing rooms, where do you cut?
Forget the small talk, here are the ones I like:
 I love this coat! I'll be making this as soon as possible! I like view B, which is a perfect car coat length, but I prefer the in seam pockets and the high collar.
 Black & Ivory Houndstooth - 70% wool/30% polyester

 I really like these two dresses... not sure if I'll make them or even buy the patterns , but I like them. I may feel more inspired if an occasion arises or when the weather warms up.
 I really like this robe. Not the illustration, but the technical drawing. I envision this in a deep purple or rich merlot velvet. It screams Christmas morning!
 I'm totally hooked on knits. This season is all about comfort for me. I don't plan to turn on the iron unless I'm sewing. I'll be making the tunic, tank and pants.
 These little pajamas are perfect for Mikaela. I'm going to pick up this pattern and save it for Christmas break so she and I can work on it together.
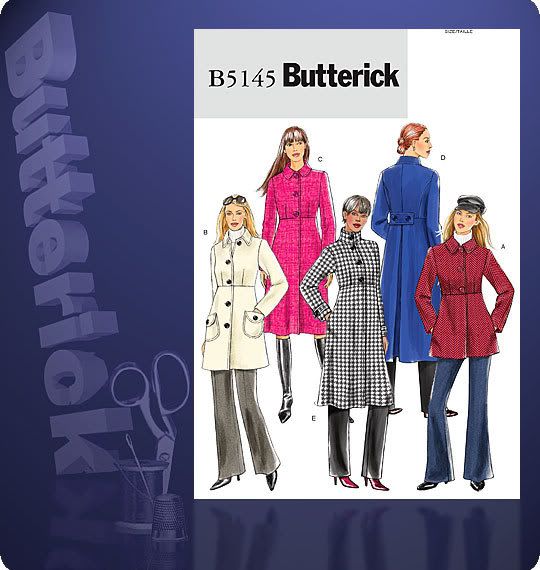 I love this coat! I'll be making this as soon as possible! I like view B, which is a perfect car coat length, but I prefer the in seam pockets and the high collar.
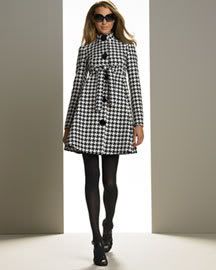
I've been stalking this coat for a couple of months now (the pic resides on my inspiration board).
 Black & Ivory Houndstooth - 70% wool/30% polyester
I had already placed an order for 3 yds of this fabric with a coat in mind.
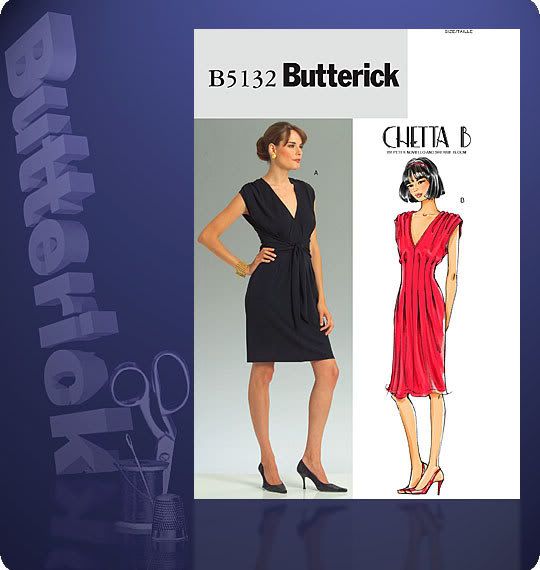
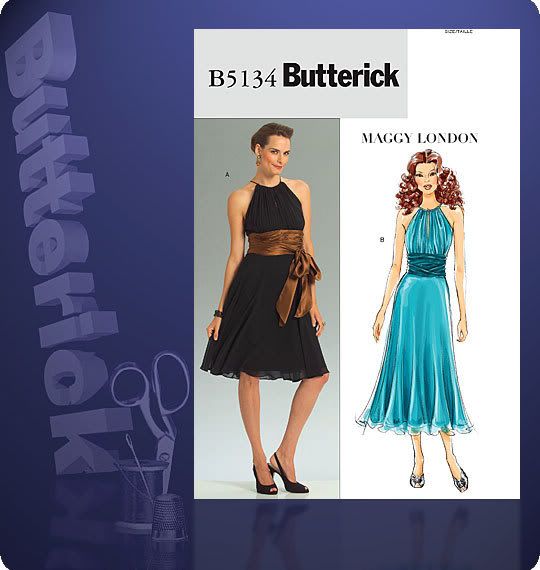 I really like these two dresses... not sure if I'll make them or even buy the patterns , but I like them. I may feel more inspired if an occasion arises or when the weather warms up.
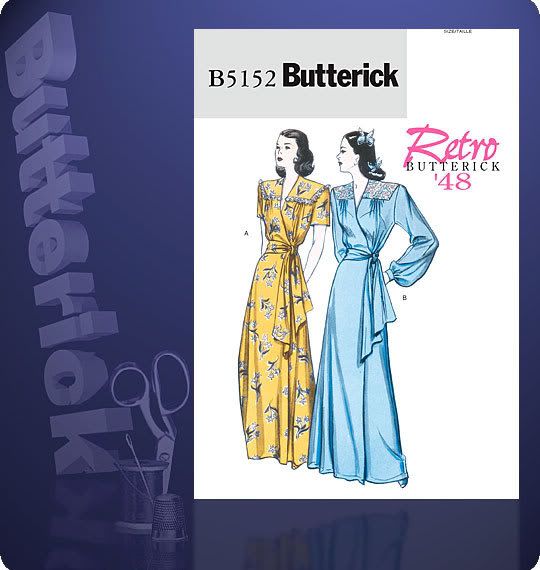 I really like this robe. Not the illustration, but the technical drawing. I envision this in a deep purple or rich merlot velvet. It screams Christmas morning!
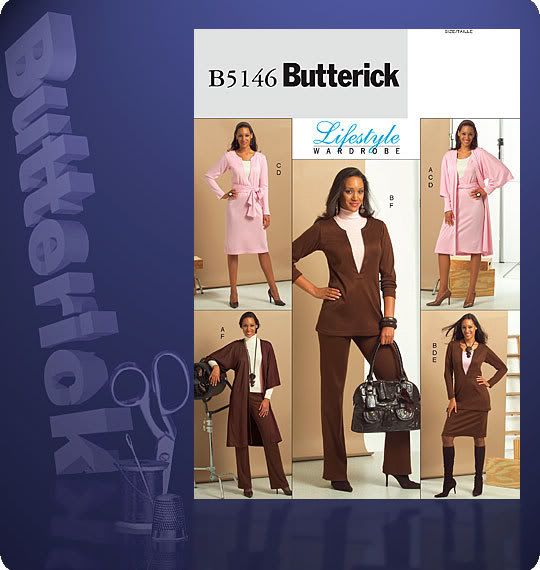 I'm totally hooked on knits. This season is all about comfort for me. I don't plan to turn on the iron unless I'm sewing. I'll be making the tunic, tank and pants.
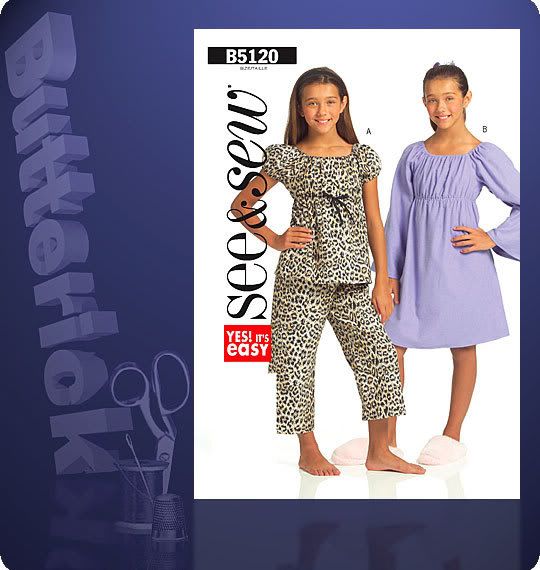 These little pajamas are perfect for Mikaela. I'm going to pick up this pattern and save it for Christmas break so she and I can work on it together.

Let me start off saying that I am the biggest Denzel fan... since he was Dr. Phillip Chandler on St. Elsewhere! I will see ANY movie he's in so this one was no exception.
Denzel portrays Frank Lucas, a North Carolina born heroin kingpin from Manhattan in 1970s America, who is smuggling the drug into the country in the coffins of soldiers returning from the Vietnam War. Denzel (IMO) delivers an Oscar-worthy performance in this role. Even when their is no dialogue, it's written all over face. As equally fantastic is Russell Crowe (Gladiator is still my favorite Russell movie), who plays Richie Roberts, the cop out to get him.
The all-star supporting cast was superb! Josh Brolin portrays a menacing, money-grubbing, slimy, dirty cop. Chiwetal Ejifor (I love his ability to drop the English accent), plays Frank's brother Huey... he's an awesome sidekick. Ruby Dee is Mama Lucas... this lady still has it! I wouldn't be surprised if there is a Best Support-Actress nomination looming in the future. Other co-stars are Cuba Gooding, Jr., Idris Elba, rappers Common, T.I. and RZA.
Ridley Scott has brilliantly directed one of, if not, the best movie of the year. If you are looking for a shoot 'em up, bang bang mob movie (i.e. Scarface) this isn't it. This movie may not have a lot of hardcore action, but it has a very compelling storyline of the rise and fall of a drug lord and absolutely captures your attention.
Go see it!
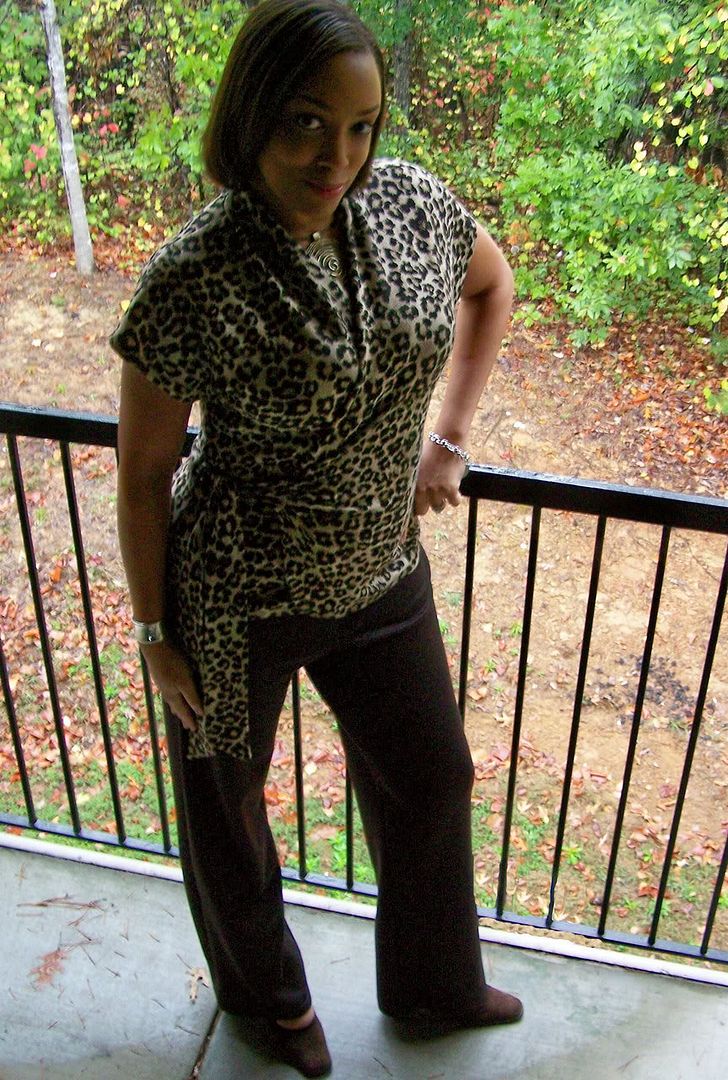
Project Details
Pattern: Butterick 5101 Views A & E
Fabric:
Top: cheetah print knit -50% wool/50% polyester
Pants: brown wool jersey
Description: Wrap front top with all-in-one sleeve, pleated collar extending into front neckline, side tie and straight leg pants have casing and elastic yoke.
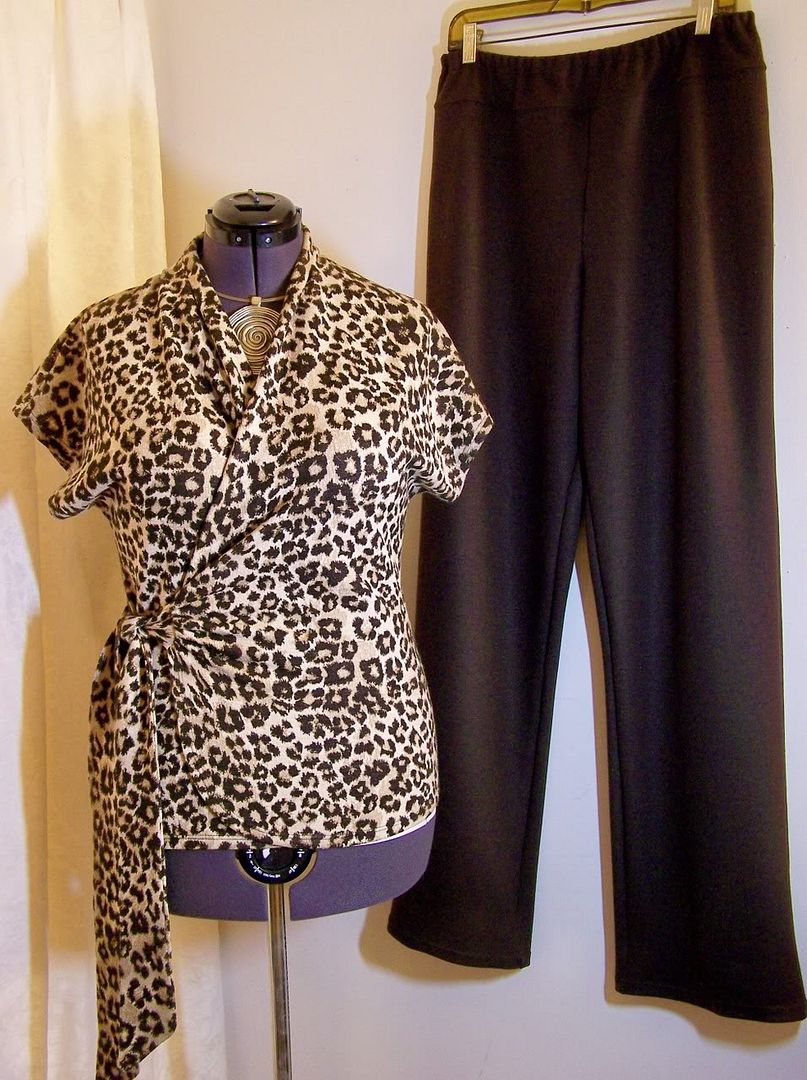 I am really loving knits this season... I wouldn't mind an entire wardrobe of knits and stretch (think Yansi Fugel)! I love this pattern! Maybe it was also the fabric I chose that gave this knit outfit the polish it needed to keep from being "ordinary".
I cut both pieces in the size large (the sizes are XS - XL). On the top, I had to lengthen it by 2 inches. I had initially planned to do view B, the long sleeve top but after I added 2 inches to the front and back and also the sleeves, I didn't have enough fabric. Since the sleeves are made into the top as one solid piece, once I made my alterations, my fabric was not long enough (that sucked). So I decided to go with the short sleeve. Another thing that I really like about this top is that it has back darts which creates a very flattering line.
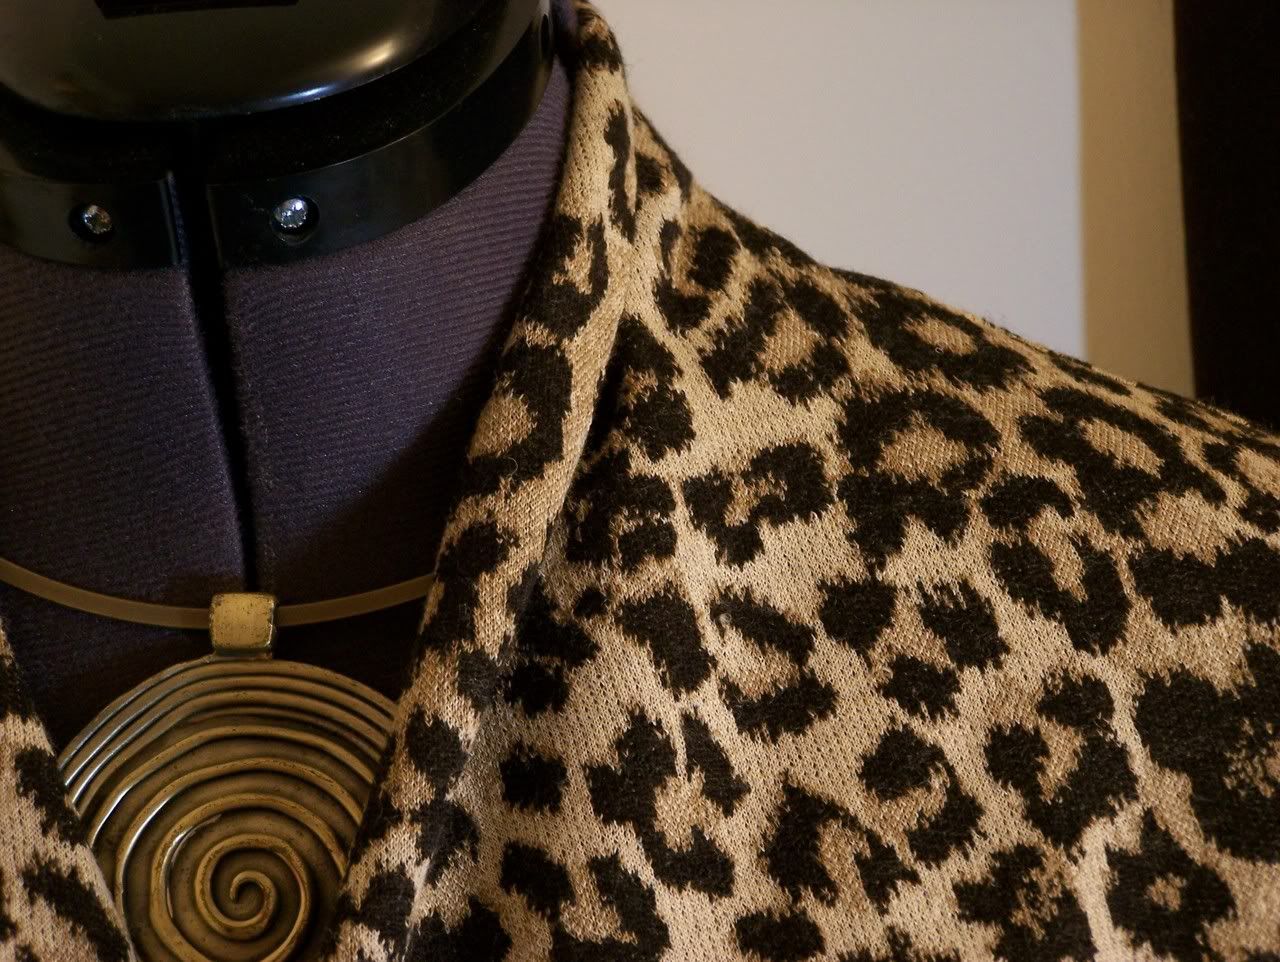 The neckline is pleated. This is created by joining the two front pieces together and stitching the pleats where indicated. Then stitching this part to the neckline of the back pieces to created a self-facing collar.
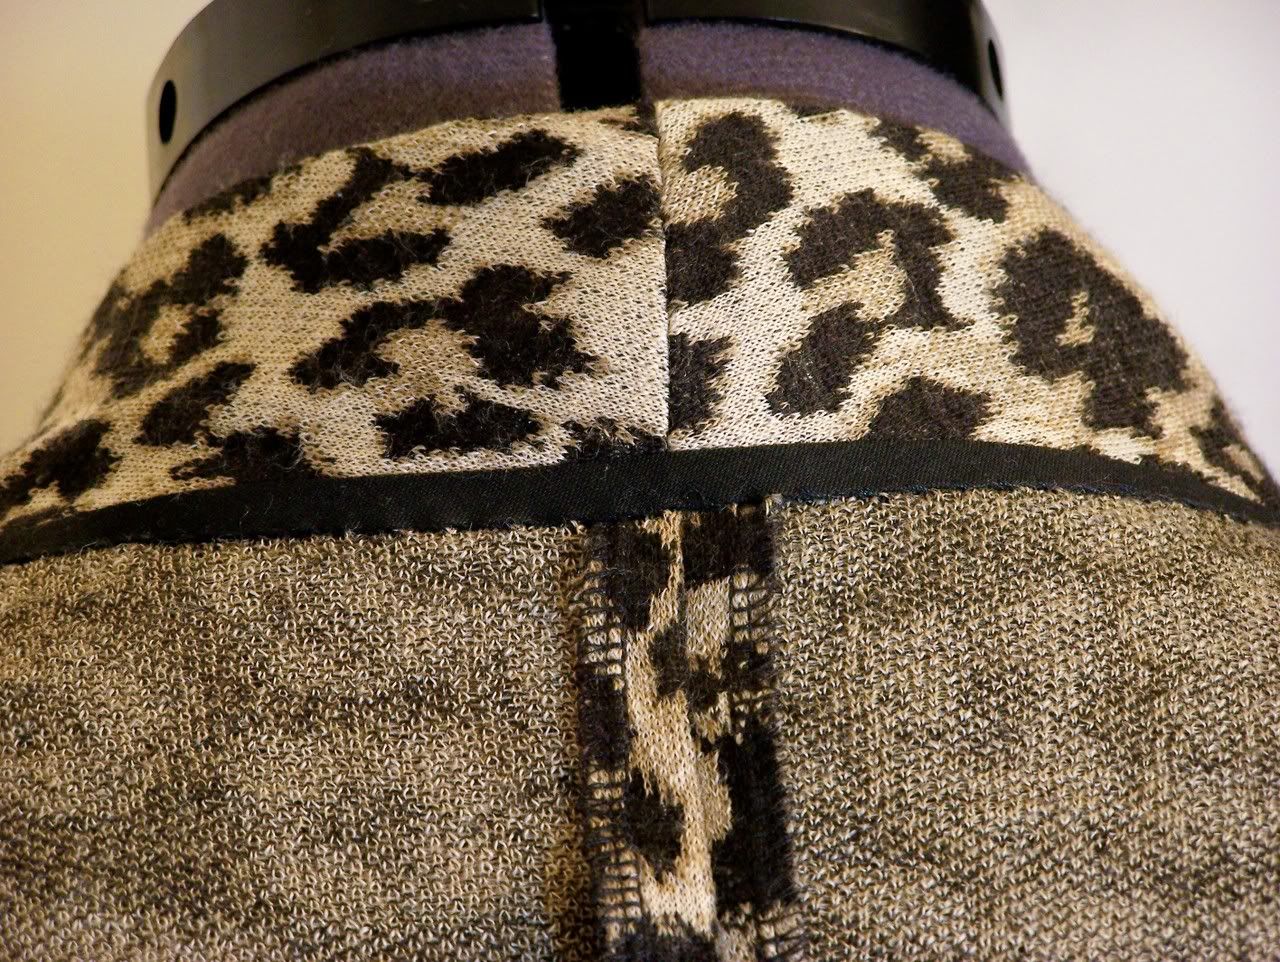 I added a strip of bias tape and the facing was turned back and slipstitched between the indicated marks. The great thing about this fabric, it has a spongy hand and the slipstitches disappeared into it.
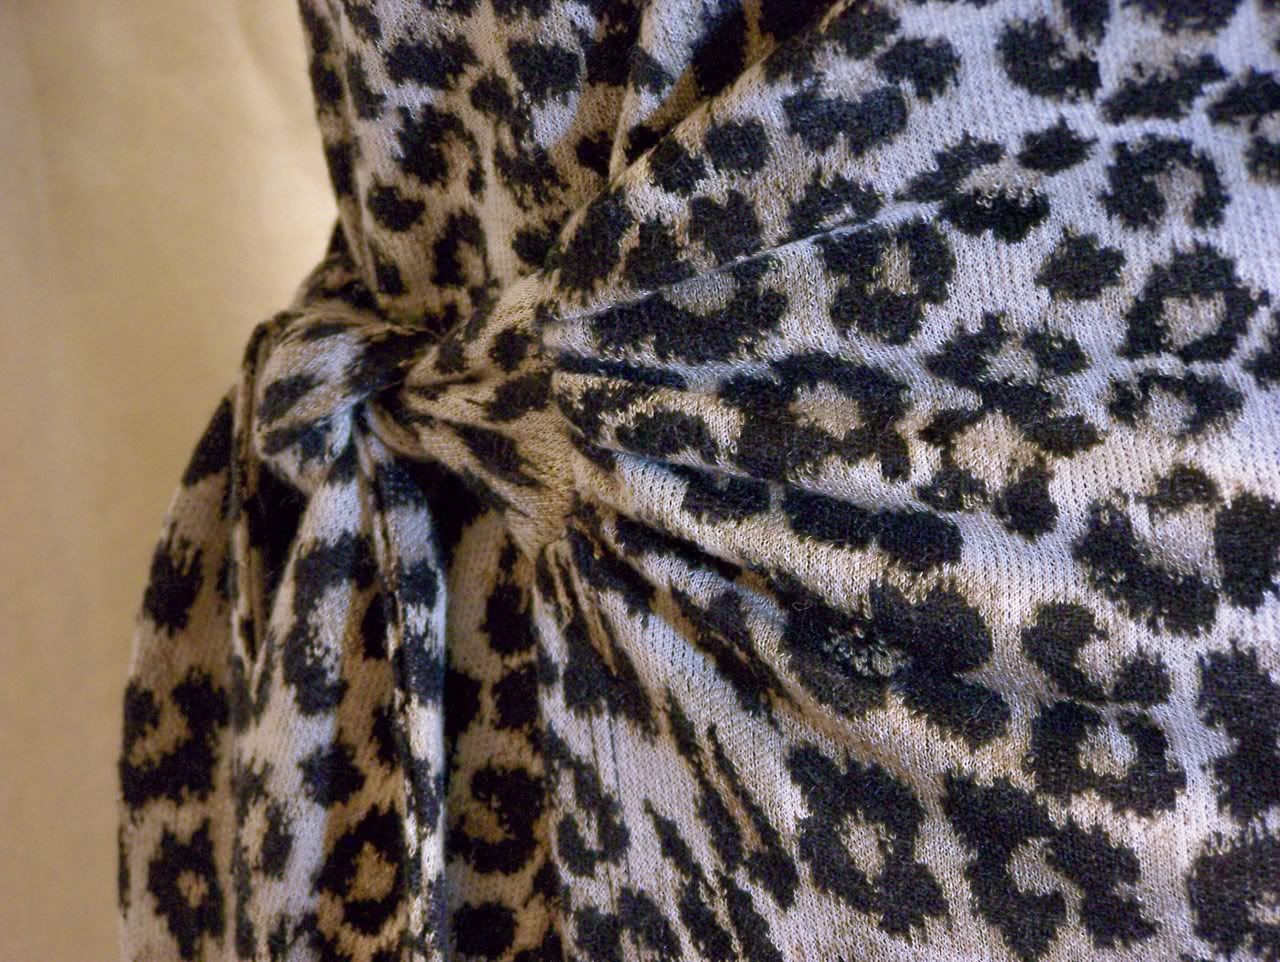 The ties were added next by gathering the fabric underneath the and basting. The final look was one that creating ruching. As we all know, ruching hides a multitude of sins.
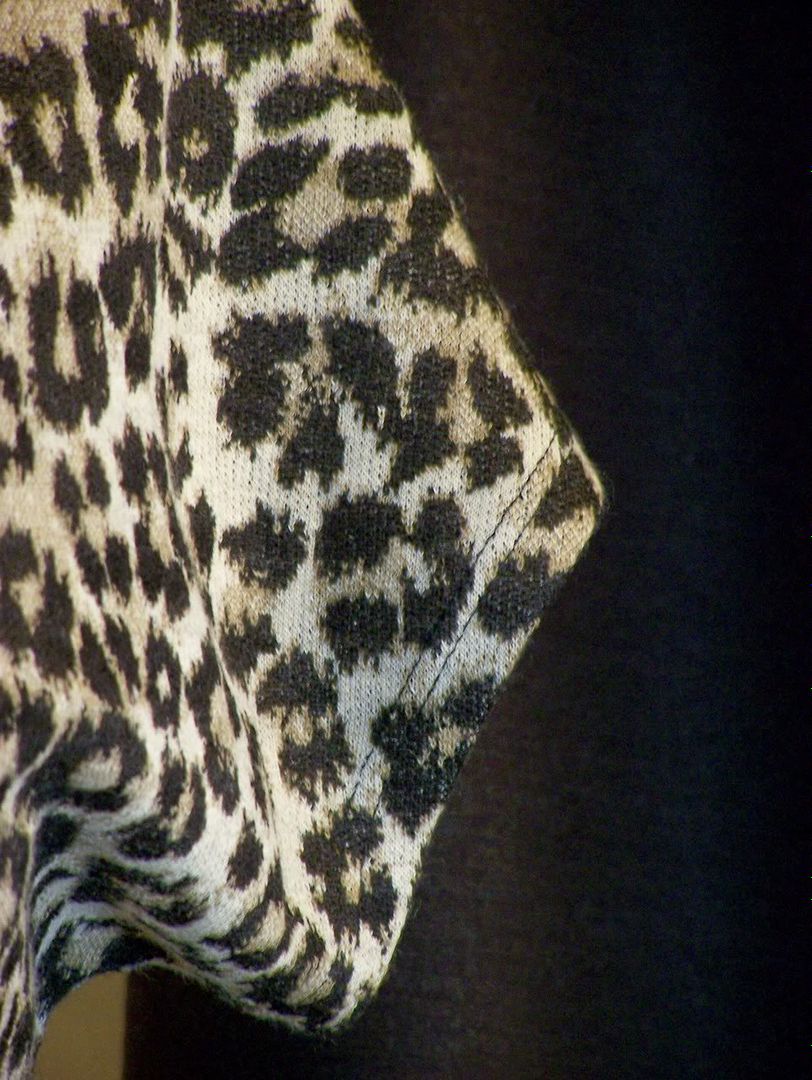
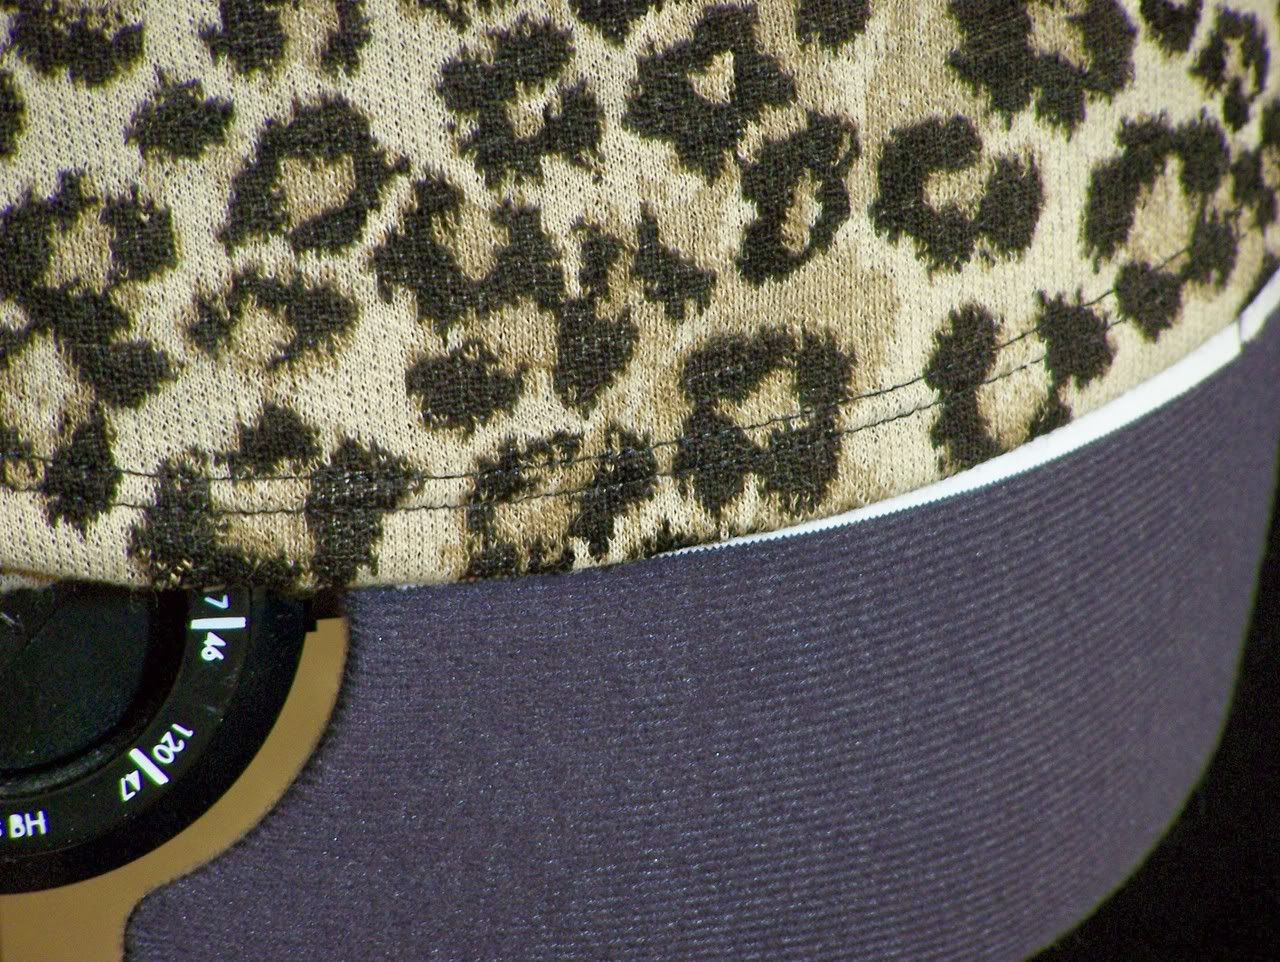
I finished with a 5/8" coverstitched hem.
The pants were really easy... basic pants construction. I did however have to add 3 inches to the length. They have a yoke which is sewn on like a waistband. The top of the waistband is folded over and sewn down to create a casing for the elastic waistband. I used a coverstitch for the topstitching on the the "yoke" seam and also on the hem.
The pants were really easy... basic pants construction. I did however have to add 3 inches to the length. They have a yoke which is sewn on like a waistband. The top of the waistband is folded over and sewn down to create a casing for the elastic waistband. I used a coverstitch for the topstitching on the the "yoke" seam and also on the hem.
The Chanel Jacket: Evoking an Icon

What a bad blogger I am! LOL I didn't even realized that it has been a whole week since I lasted posted. So, if you wonder what I've been doing, I've been doing extensive research for my version of the ICONIC - Chanel Jacket! Yes, this jacket requires research! I've become completely obsessed with all things Chanel and the idea of making this jacket. I have gathered my fabric, chose silk charmeuse for the lining, selected my trim (still need to pick buttons), found my patterns - Vogue 7975 as my base pattern, and Vogue 8259, because 1) I absolutely love the three-piece sleeve construction and 2) the couture construction techniques and quilting details. What I love most about this jacket is the fact that it can be dressed up or down... I'll wear mine most with jeans and remain très chic!
Here are my list of references:
Here are my list of references:
- Jackets For Real People - for the fitting details
- Couture Sewing Techniques - the section on "Chanelisms"
- "Inside Secrets of a Chanel Jacket", Threads #121-Oct/Nov 2005
- The Sewing Divas
- Marji's version of Vogue 7975
Over the next couple of weeks, I plan to make very picture oriented detailed posts documenting this entire process.
BTW, If you wanted to try this jacket and didn't want to do all of the couture techniques, there is a great article -- "Shortcuts to a Designer Jacket" in Threads #128-Dec 2006/Jan 2007.
BTW, If you wanted to try this jacket and didn't want to do all of the couture techniques, there is a great article -- "Shortcuts to a Designer Jacket" in Threads #128-Dec 2006/Jan 2007.
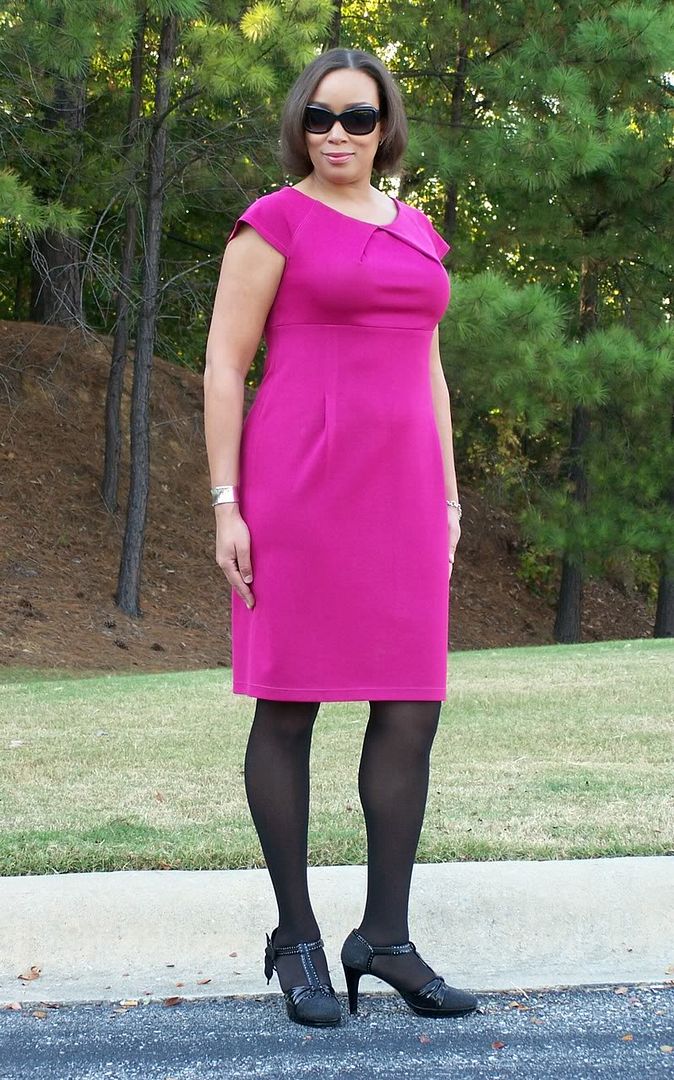
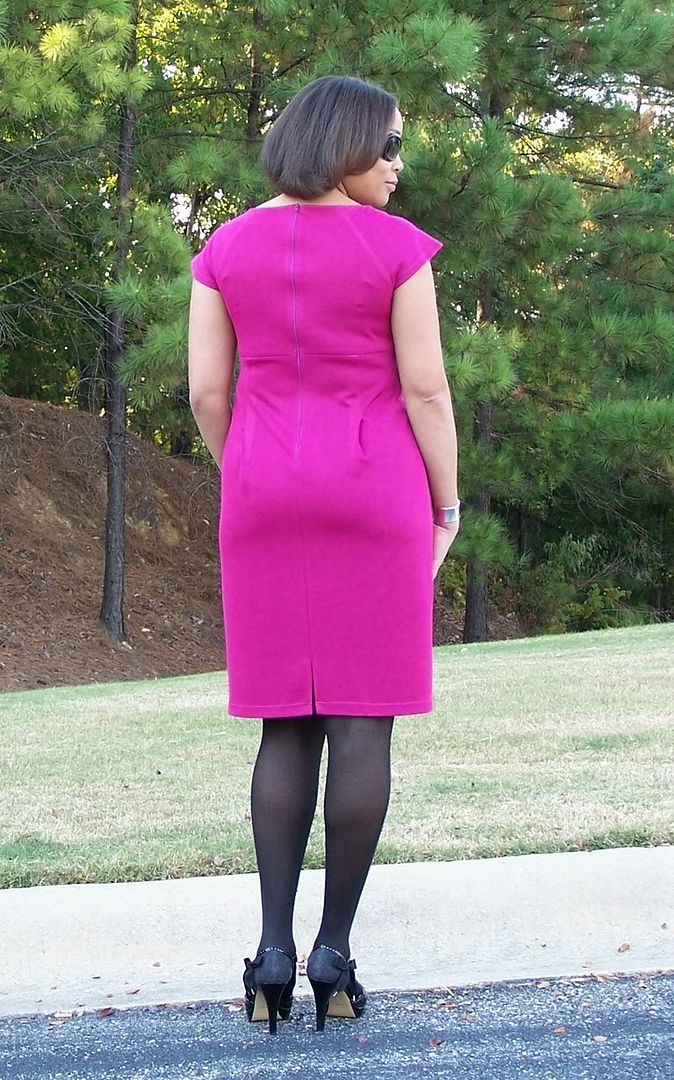 Project Details
Pattern: BWOF 09-2007-117
Fabric: Fuchsia Satin Jersey
Notions: 22" zipper
Description: "A new version of the sheath dress, this time not cut classically straight but in tulip shape. Add some cap raglan sleeves and bright plaid fabric for a very trendy garment indeed!"
This is my very first Burda World of Fashion pattern! Now, I'm kicking myself because I've wasted so much time and let so many great patterns get away. The tracing wasn't as bad as I thought it would be... just an additional step and then on to cutting and sewing. The pieces are very will drafted and I am an official Burda convert!
I cut a size 40 for the bodice and blended to size 44 at the hip. I was initially concerned whether or not a FBA would be needed. I didn't have anything to go by because neither of the other sewers who reviewed this pattern on PR had a full bust issue, so I was on my own with this. Once I sewed my muslin, I saw that the fit of the bodice was fine, but there were a couple of other adjustments I needed to make. I had a few horizontal lines, front and back on the skirt part at the pleats. I reduced the length of the pleats by 1" which allowed me a little more ease. Also, I didn't care for the length of the zipper. It stopped right in the crack of my butt and "bubbled out" right there. I moved the stopping point of the zipper up 2" to a more comfortable spot.
Since I used a jersey knit instead of a woven, I decided to omit the lining since this type of jersey is pretty heavy and can hold it's on (with proper foundation garments of course). I also used a coverstitch for the sleeve and the skirt hems and to also topstitch the raglan seams.
I had been doing a lot of snoop shopping lately, I noticed that a lot of high-end RTW dresses (i.e. Dolce & Gabbana, Vera Wang) had "exposed zipper fastenings". I decided this would be an interesting design feature to add to this shift dress.
As you see, I omitted the collar. When I made my muslin, I didn't like the way it looked on me. I kept having the urge to pull on it. I really like the boatneck style and it really shows up the pleated bodice's detail. Another plus was that when I was making my muslin, the neckline of the dress looked really familiar to me. I scrolled through my "inspiration file" (everytime I see something that peaks my fancy, I save it) and I found it! This dress reminded me of the RM designed by Roland Mouret - Moon Dress, that retails for a mere $2,150.
I'm very happy with the way the outcome and I can't wait for an occasion to wear this.
This weekend, we celebrated our 16th wedding anniversary (Oct. 14th). This year we decided to stay home and cook together with the kids since we had a big to do last year. It's always fun to cook with the kids. We prepared roasted cornish game hens with wild rice stuffing, sauteed green beans with baby portobello mushrooms, shallots and garlic and a nice bottle of white wine for the grown ups.
 Saturday night, Michael and I went to the movies to see Why Did I Get Married. This was Ty.ler Per.ry's best effort by far. I've read different reviews and varying opinions, but we all really thought this was a great movie... very relatable for us married folks.
I did very little sewing this weekend, but after some household maintenance, I'm back at the cutting table. So, what did you do?