Every year, I like to make at least one substantial coat. Last year, it was my beloved cashmere pea coat. So this year, I decided it would be a classic camel's hair coat. I wanted a coat that I would love and cherish for years to come... nothing trendy at all for this project. Just timeless elegance.
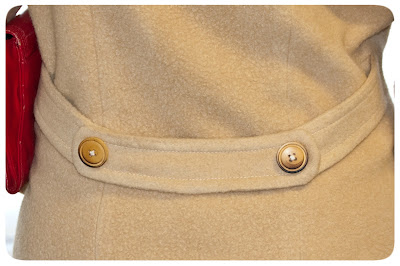
I picked Simplicity 1759 for my pattern. This pattern is great because you can choose either a single or double-breasted style; choose notched or stand collars or just collarless. It has patch or welt pockets and back belt variations. And most importantly, a two-piece sleeve.
I picked this beautiful camel-colored 100% camel's hair fabric. It's described as "a heavy weight camel wool with a long brushed nap. Very soft, slightly spongy." This is a napped fabric with a raised pile. Which means it's best to layout your pattern and cut (on a single layer) with the nap running down the garment. It'll wear better and pill less. With ALL pieces going in the same direction. Also, since this fabric is thick, I used a 100/16 needle and a 3 mm stitch length. And I pressed the fabric on the wrong side using a fluffy terrycloth towel underneath. This is my first time sewing with camel's hair, so it was all experimental.
I cut the size 14 and graded out to the 16. I added 3 inches to the length. And 1 inch to the sleeves. I made a 1 inch FBA. I followed the instructions for interfacing. But I padstitched the collar and taped my roll lines on my lapels. I also interfaced my hems.
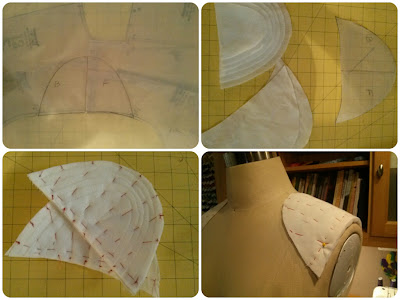
I also added a back stay (didn't photograph it, but you can check out previous ones here) and custom made shoulder pads.
Made these using polyester fleece and a layer of muslin.
My goal is to always sew a set-in sleeve perfectly on the first try. Here is my tried and true method:
I used two 2" x 12" bias cut strips of hair canvas. I marked the center of each strip and pinned to the wrong side at the top of the sleeve cap with the raw edges matching. Beginning at the center where the pin is, I stitched the bias strip to the sleeve cap using 1/2" seam allowance while fully stretching the bias strip... ending at the notch. Then I repeated on the other side. Note: if your machine doesn't have a seam allowance guide on both sides, you can use a piece of tape. Then your sleeve is ready to be pinned into the garment and sewn. The bias strips also act as sleeve heads!
I used a silk charmeuse from my stash. And I bagged my lining.
I used Gutermann Top Stitching Heavy Duty Thread for top stitching, buttonholes...
And buttons.
Since some of you are often curious as to where I wear things, on Monday I attended a Spring 2014 Fashion Preview at Belk. I'm with Arlene Goldstein, VP of Trend Merchandising and Fashion Direction. I'll be blogging more about the fabulous trends to look forward to later! Notice how leather was trending! I got to wear one of my new favorites, my Vogue 1251 lambskin leather and wool crepe dress!
In conclusion, the idea that I created a coat that is similar to coats produced by designers such as Max Mara, makes me very happy. Coat making is really easy, but there are just a lot of time consuming steps. You have to (with experience) teach yourself how much tailoring and/or shortcuts you want to apply to your constructions techniques. And most importantly, that timeless beautiful fabric is really what makes a great coat, so choose wisely!


