
Slit Sleeve Tutorial
9:30 AM
Here is a quick tutorial of how I created my slit sleeve with a cuff.

My base pattern is (OOP) McCall's 6650. But you can modify any sleeve to achieve this detail.

To begin, you have to create a two-part sleeve, which is not to be confused with a two-piece sleeve that's used in tailored garments. Now you'd think the easiest way to do this would be to just fold the sleeve in half to determine the center, but you'd be sorely wrong.
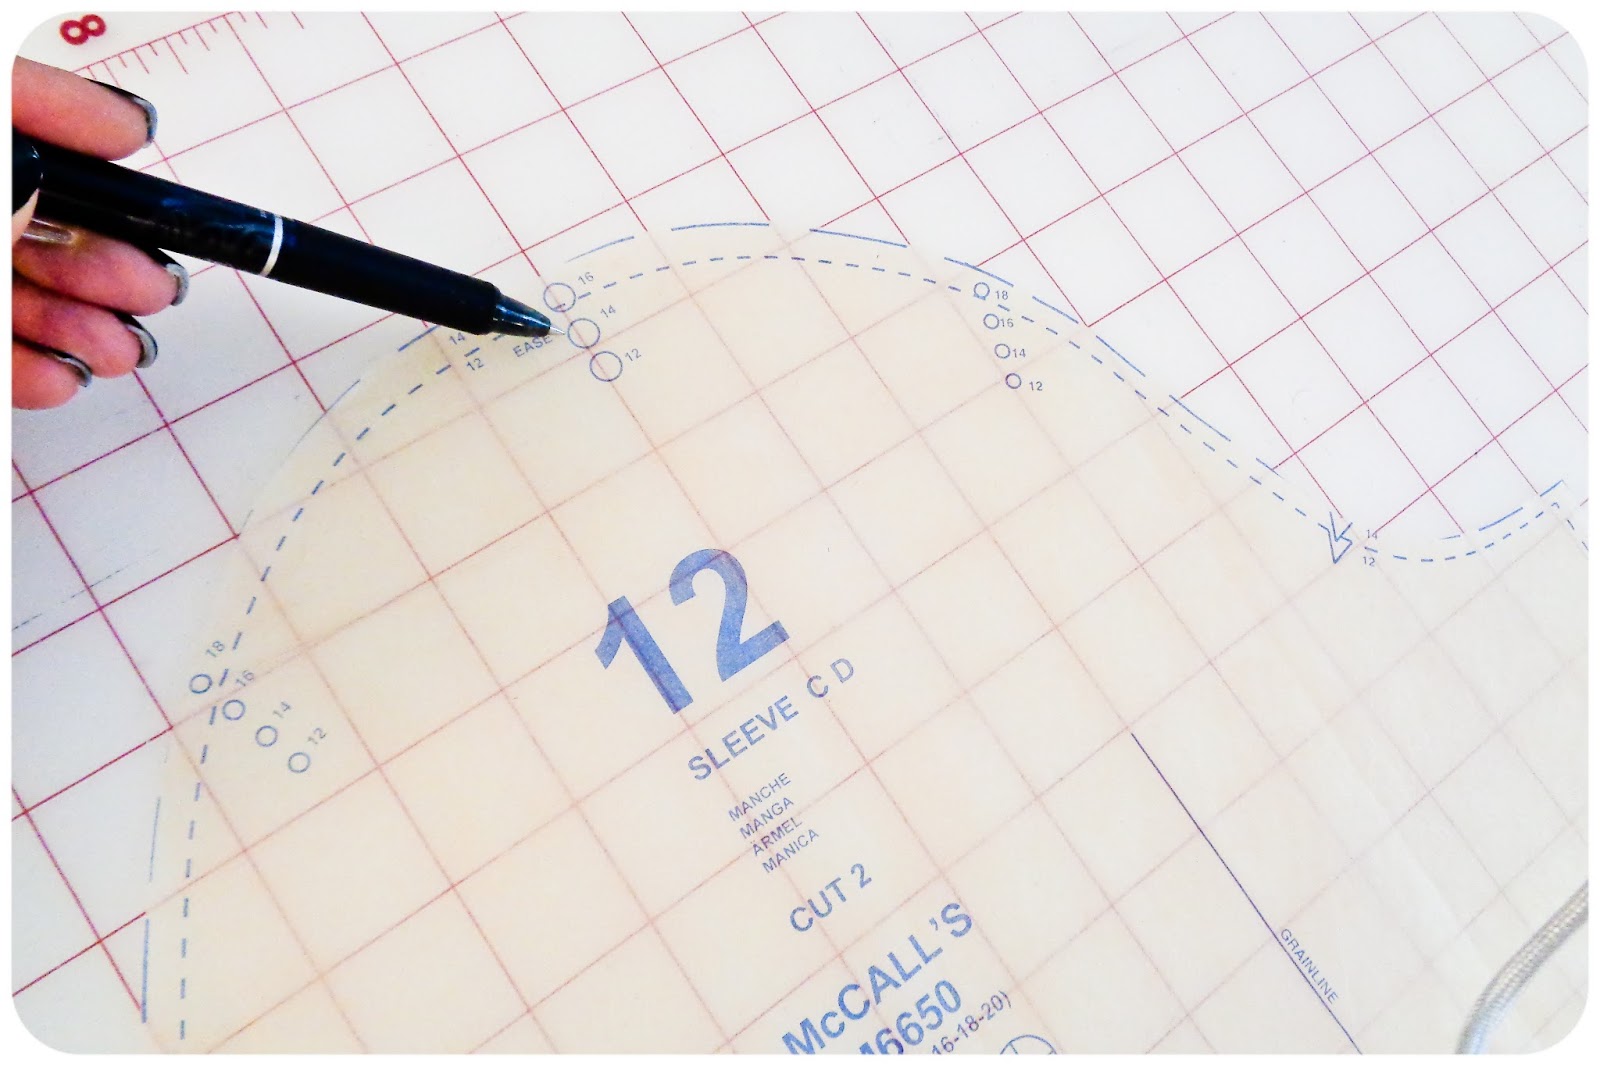
At the top of the armscye, you'll notice that there is a shoulder point match circle. This is where your sleeve matches the shoulder seam of your bodice. If you were to just cut your sleeve straight down the middle, your slit would be behind your shoulder seam.

At the shoulder match point, draw a vertical line parallel to the grainline from the top of the armscye to the bottom of the sleeve. This where you'll cut your sleeve in half. You can modify your pattern if you like or trace it onto paper.

Now, trace each sleeve part onto paper and add your seam allowance.

Make sure to add your notches so you'll know the front and back.

Since the inside of the sleeve will inevitably show, I wanted it to be "clean". So, I suggest lining it.
Cut 2 of each in fashion fabric. Cut 2 of each in lining fabric (I used a poly chiffon).
Sew the lining to the matching sleeve part, press and understitch. Do the same thing for all of the pieces.

With your sleeve part and lining still opened flat, stitch the front and back pieces together at the seam, 5/8" from the top of the armscye. Then open it out and press. This is more of a "flat lining" method, similar to underlining. Baste the lining to the fashion fabric. And set the sleeve. I set my sleeve flat.

And I added a cuff to the bottom.

There are different design details to add to the bottom, from a cuff, to elastic or ties. The choice is yours.


6 comments
Very good illustration Erica.
ReplyDeleteLaToria
Thanks LaToria!
DeleteLovely details ... FIESTA ;)
ReplyDeleteThanks Monica!
DeleteAwesome Tutorial. Thanks for Sharing.
ReplyDeleteThanks Sheila!
Delete